Memorial Shirts - Contrasts
I machine pieced this quilt on my Bernina 240.
I quilted this quilt on my Janome QMP-18 long arm.
Finished size: 54" x 70"
I quilted this quilt on my Janome QMP-18 long arm.
Finished size: 54" x 70"
(click on photos to enlarge)
✫FINISHED QUILT:✫


Front piecing: To memorialize a young man's father, I used his dad's gray, tan, blue and navy shirts to make 35 blocks, each 9"x9". For the quilt's constant, I used a patriotic fabric of red and blue stars on a white background to encourage contrast. Also keeping with the contrasting theme, I used black for borders and binding. The original pattern, "Fat Quarter Fancy", calls for 36 blocks to be laid out in a square (6x6 rows). But I chose to do a rectangular 5x7 layout instead.
The final outer border is a "Saw Tooth" pattern made from half-square triangles, leftover from the creation of the 35 central blocks.


Back: The backing fabric is 3 yards of a gray & white print called "Calico Gray" by Keepsake. I added a solid 7" black strip vertically down the center of the backing fabric, to accommodate the 54" width of the quilt, without having to do too much piecing.

Quilt Stitching: The quilting pattern is an edge-to-edge called "Circle Meander", which I adjusted slightly to have less of a circle and more of an oval shape.


The front of the quilt is stitched in a neutral tan thread called "Bone" (So Fine 50 #452).

The back of this quilt is stitched in "Black" (So Fine 50 #411).

✫INSPIRATION:✫
I made this memorial quilt for the son of a dear friend who lost her husband just over a year ago. They were together for more than 3 decades. She has two grown children, and this quilt is for her youngest, who is a senior in college. She told me her son is color-blind, and that the quilt needed to be masculine. Everything else was up to me. So I made sure to use shirt fabrics that provided excellent dark/light contrast with each other, and also included some patriotic fabric to honor her husband's military service.
✫PROGRESS PHOTOS:✫
Construction-Front:
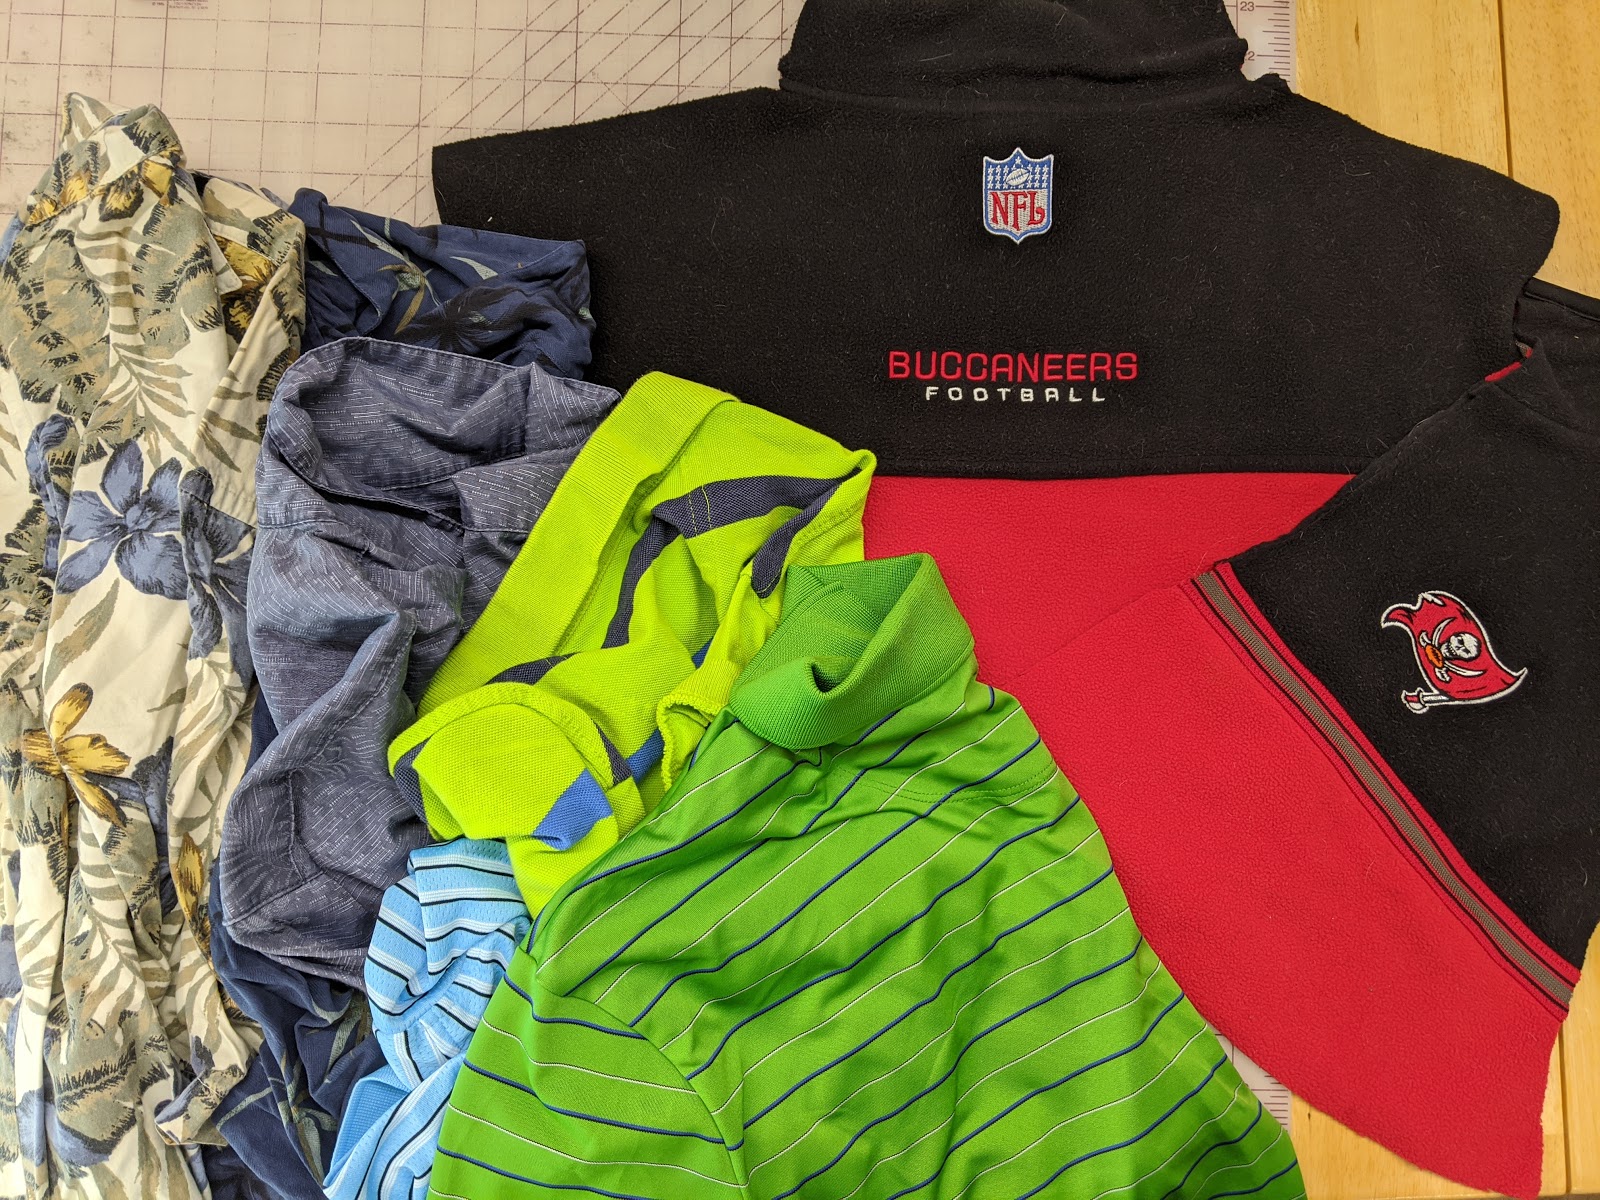
This quilt top is made from shirts worn by the recipient's dad. The shirts are from several different fabrics: polyester shirts, rayon Hawaiian shirts, cotton dress shirts, poly-cotton blend polo shirts, cotton T-shirts, moisture-wicking shirts, pullover sweaters, and even a fleece jacket.

Because there were so many different types of fabric to work with, some of the flimsier, thinner or stretchier shirt pieces required a layer of fusible featherweight interfacing to be attached before piecing.


I chose the red & black fleece jacket to be the centerpiece of the quilt. I arranged all the other blocks around that one. Its red is the only bright color I took from the clothing. All other fabrics were chosen with one goal: to contrast light and dark neutrals. Here's progression of the block placement on my design wall.


The pattern, "Fat Quarter Fancy", calls for sewing a 4.75" square on two opposite corners of a 9" square. By sewing 2 additional seams at each corner when building the original blocks, two completed half square triangles are also made! So I had over 70 HST's already available to make a "Saw Tooth" border once the central piecing was completed.
Of course, had to do lots of sliver trimming to get all of the half-square triangle blocks uniformly sized to 3.5" each.

Chain-piecing all of the 3.5" HST's to make the outer border.

When converting the shirts into quilt blocks, I even left a couple of the front pockets attached.
Quilting:

The backing and batting (I prefer Warm & Natural) are loaded with the top floating on my Janome QMP18 long arm, ready to be stitched with edge-to-edge quilting in the "Circle Meander" repeat pattern. (I slightly adjusted the stitching's circles to be a bit more oval, though- I didn't want to take away from the perfectly circular fireworks printed on the white fabric).


The "Circle Meander" pattern is a great compliment to the straight lines and angles of the pieced top.

Beginning stitching the first of seven rows.

Finishing up with the quilt's last row of stitching!
Trimming:

Squaring up the quilt after taking it off the long arm, getting it ready to add the label and binding.
Binding:

First attaching the binding strip to the back of the quilt...

...then wrapping it around to the quilt front.

For precise binding seam sewing, I use my Bernina 240's blind hem foot.
Washing:

I machine washed this quilt with dye trapping sheets (I use either Color Catchers or Color Grabbers), to absorb any fabric dyes. All of the shirts used for this quilt were pre-washed, so there wasn't much fabric dye to "grab" from them, but the gray and black fabrics did free a little dye. After washing, the quilt is soft and huggable, ready to be used and loved for a very long time.
✫QUILT SUMMARY:✫
I machine pieced this quilt on my Bernina 240.I quilted this quilt on my Janome QMP-18 long arm.
Finished size: 54" x 70"
Front piecing: 35 blocks made from shirt fabrics using the "Fat Quarter Fancy" pattern, laid out in a 5x7 rectangle instead of a 6x6 square. An outer "Saw Tooth" border surrounds the rectangle.
Back: The backing is a gray & white print called "Calico Gray" by Keepsake, with a solid 7" black strip inserted vertically down the center.
Binding: The binding is machine sewn, using a solid black cotton.
Quilting: Edge-to-edge "Circle Meander" pattern (slightly skewed to be more oval). Front stitched with Superior Threads' "Bone" (So Fine 50 #452), back stitched with "Black" (So Fine 50 #411).
Comments
Post a Comment