Color Slat Batik Lap Quilt
I machine pieced this quilt on my Bernina 240.
I quilted this quilt on my Janome QMP-18 long arm.
Finished size: 59" x 58"
Finished size: 59" x 58"
(click on photos to enlarge)
💐FINISHED QUILT:💐


Front piecing: 36 blocks, each made up of 6 "slats": 3 batik and 3 black+white. Inspired by Karen Brown's "Colour Slat Quilt".
Borders: One narrow scrappy black print border, followed by a 5" pieced border made from alternating batik and black+white triangles.


Backing: The back is a wide black and white floral print called "Mini Daisy".

Quilt Stitching, Pattern: I quilted using edge-to-edge "Sticky Buns" by Anne Bright Designs. Fantastic end results with this design!

Quilt Stitching, Thread (Front and Back): I used "Black" (So Fine 50 #411) thread for both the front and back of the quilt.

Label: Attached one of my customized printed fabric labels from EverEmblem to the back of the quilt. (I placed it strategically so that the stitching would blend in with the piecing on the front).
💐INSPIRATION:💐
A few months ago, I had the fortunate opportunity to purchase a great deal of fabric at a great price. A woman was retiring from sewing, and her daughter-in-law was assisting her in selling much of her huge fabric stash. Recently this woman unexpectedly passed away, and when her daughter-in-law shared this news with me, I felt compelled to create a keepsake for her from the fabric her mother-in-law had carefully collected over the years.
The batik triangles and the colorful “slats” were all precut by her mother-in-law for a kit that she started but never assembled. In fact, every single piece of material on the front of this quilt came directly from her stash that I bought. Even the binding is from some of her fabric yardage. My hopes are that seeing all of these beautiful fabrics that once belonged to her mother-in-law will bring the recipient fond memories of happy times.
💐PROGRESS PHOTOS:💐
Construction-Blocks:

As part of the fabrics I purchased a few months ago (mentioned above), I bought a few kits that had many pieces already cut from batik fabrics, but the kits were never assembled. I used several of the pre-cut strips in the making of this quilt, as well as in another quilt I recently completed, the Weaved Batik Quilt.

One of the YouTube personalities I love to follow is Karen Brown, of Just Get It Done Quilts. She shares "stashbusters" patterns, and when I saw her "Colour Slat Quilt", I knew I wanted to create one.

Karen offers two different methods to build the blocks, and since I was working with already cut strips as well as fat quarters and small yardage pieces, I used both methods. I couldn't follow her pattern's exact measurements (because most of the fabric strips were already cut for a specific kit and were not common sizes), but both construction methods still worked perfectly.

Sometimes I even used a combo of both methods.


Then I carefully matched seams, pinned, and joined all 36 blocks together.
Construction-Borders:

I first added a scrappy narrow inner border made from strips of black printed fabrics.

Then I began to ponder what pieced border I would use to finish the quilt top. I decided I really wanted to use up the pre-cut batik triangles that were also part of the unused kit.

I tried four different combinations of triangles before I found one I thought worked well with the slat blocks.

Chain piecing made building the outer borders go pretty quickly, and once all 4 sides were attached to the quilt, I had to figure out the corners. Without an exact pattern and using triangles that were already cut to a specific size, the math wasn't very clean, so I had to be a bit creative.


Quilting:

The backing and batting are loaded, and the top is floated to be sure everything is squared and ready. I baste the quilt completely, down one side, across the belly bar, and back up the other side, advancing and repeating, before I actually quilt it.

This is the first time I've used Anne Bright Designs' "Sticky Buns" digital pattern. Its swirls are a perfect complement to the sharp lines and angles of this quilt!

Beginning the first of 5 rows.

Just *love* how this quilting pattern looks with this piecing!


Fresh off my longarm, and I'm thrilled with the overall look already, even before binding or washing.
Trimming:
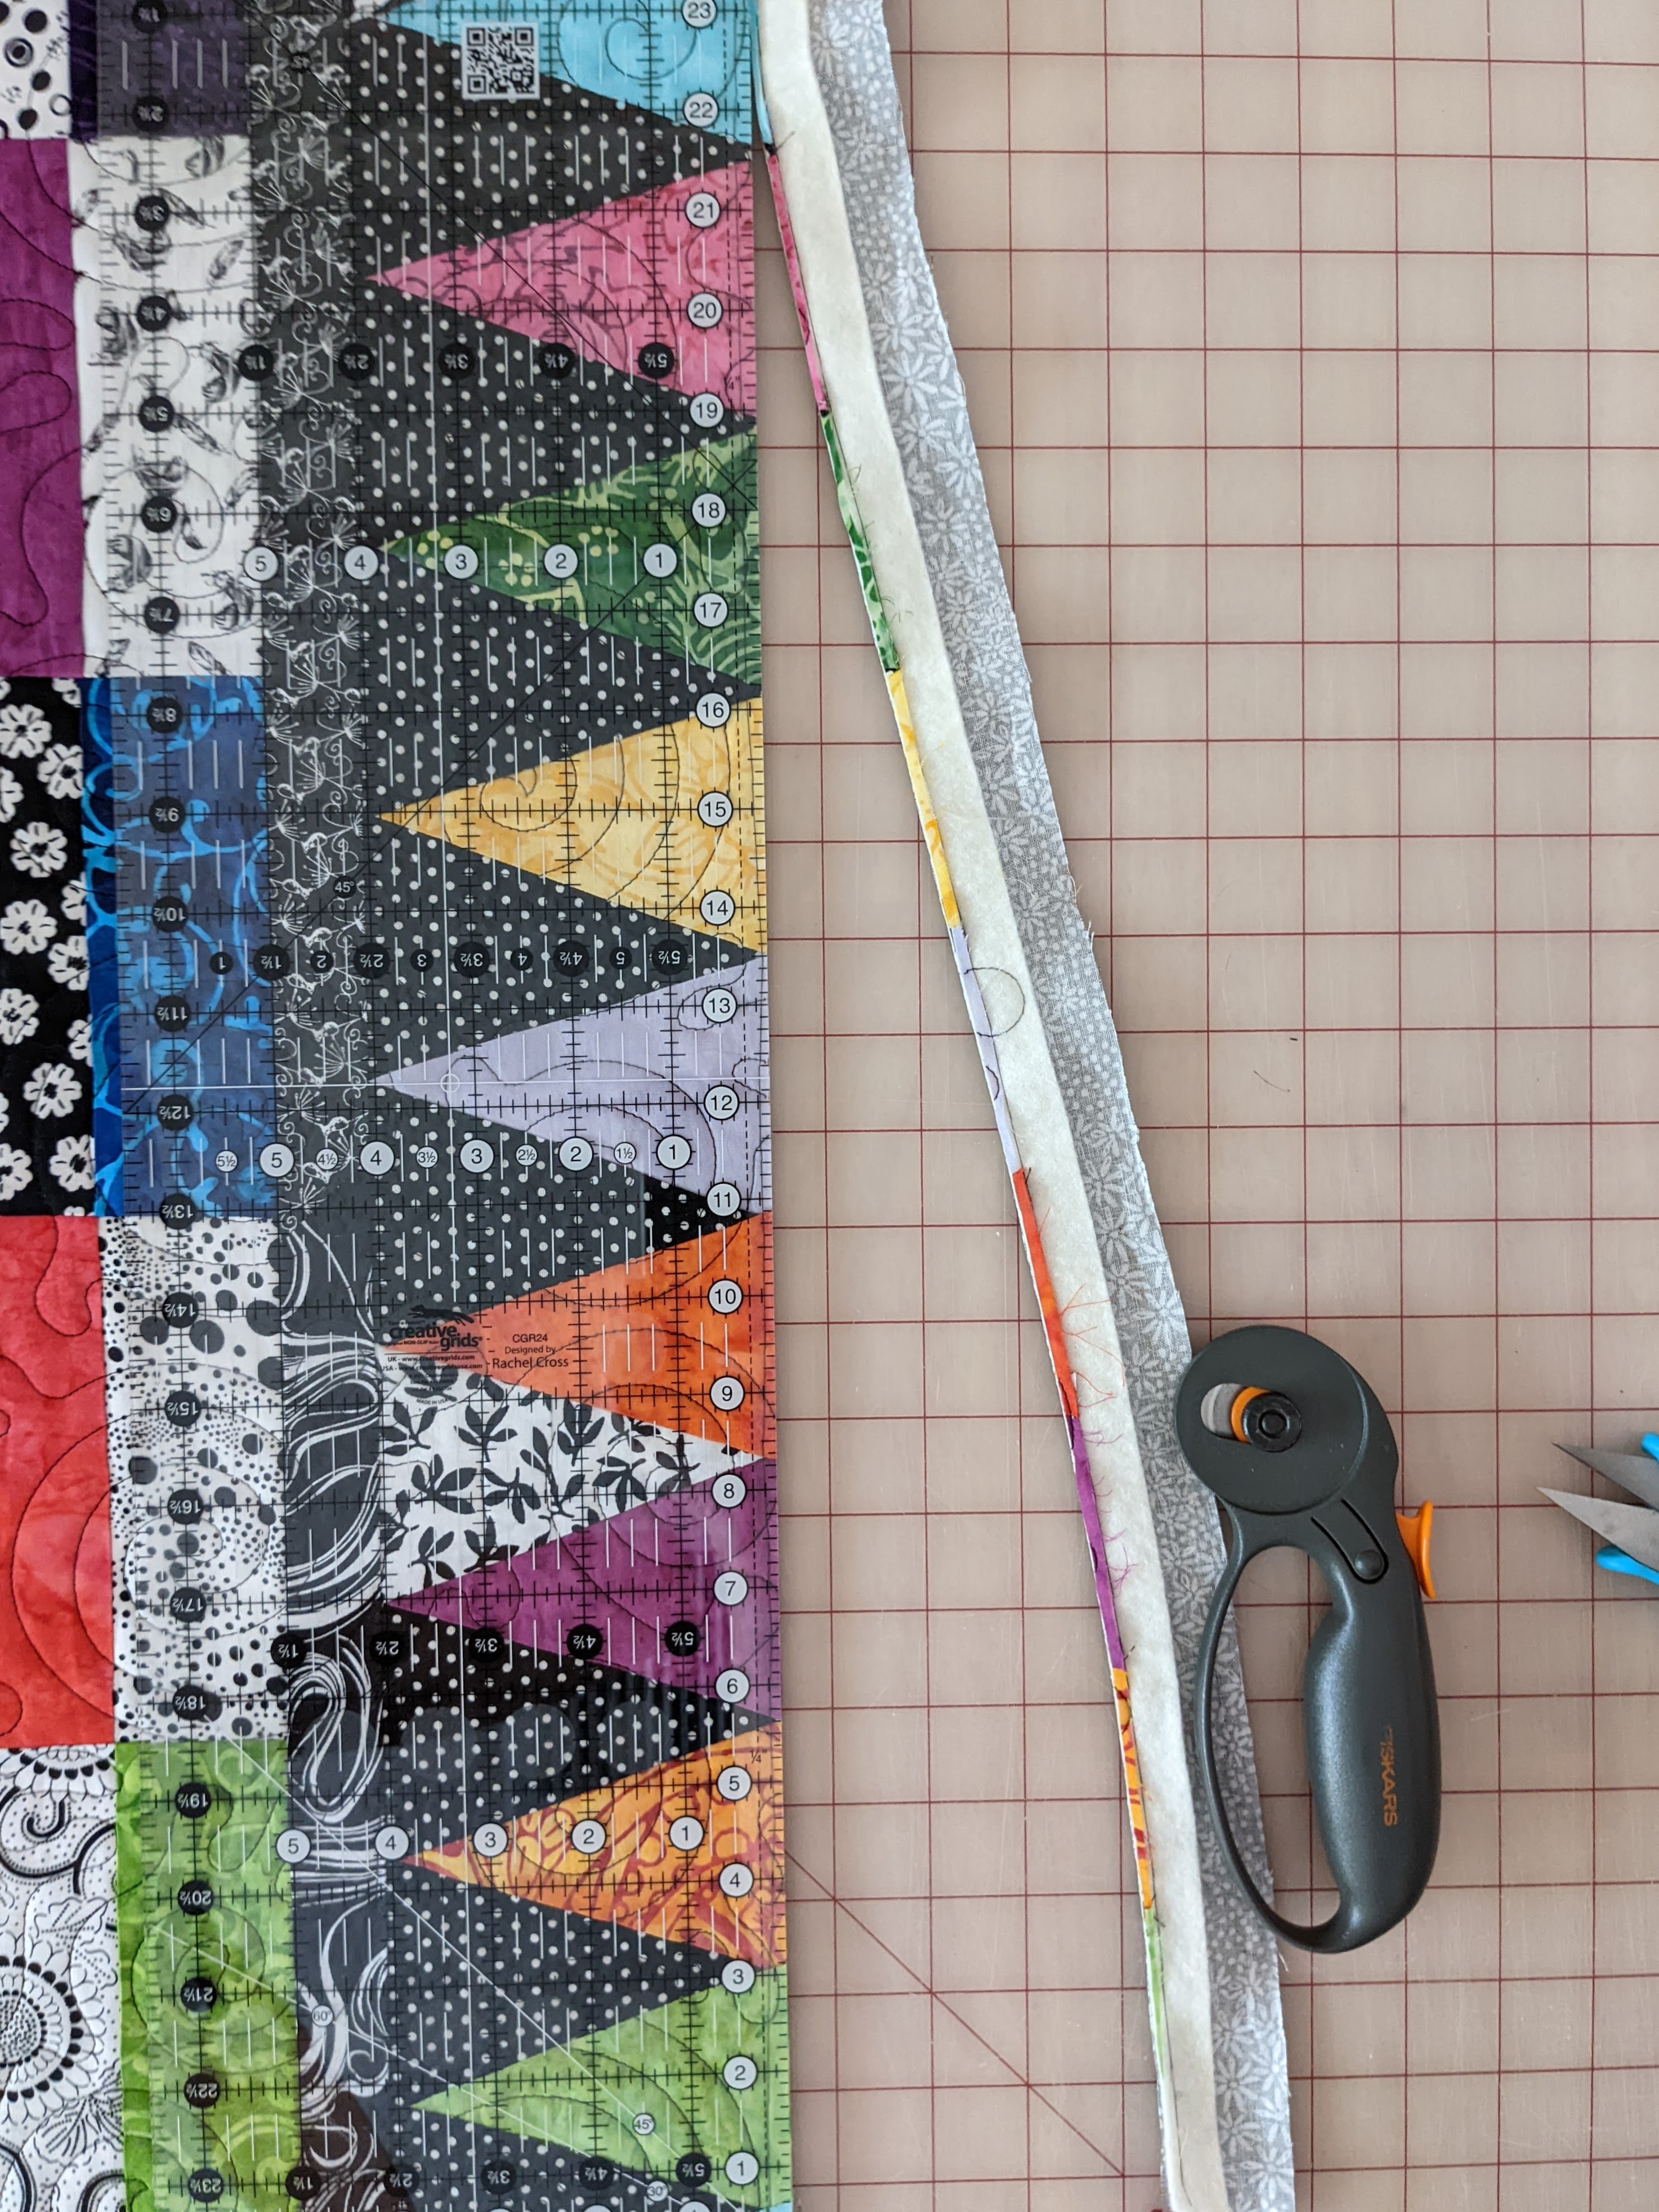
Squaring up the quilt after removing it from the long arm, readying it to add the binding.

Binding:


First attaching the binding strip to the back of the quilt...

...then wrapping the binding around and sewing it to the quilt front.


I've finally practiced enough that I'm very happy with the results of using my machine to attach the binding to both the front and back of the quilt. The stitching accuracy on the front is especially pleasant now. (I just don't have the endless hours I would need to hand sew on every binding, so the machine method works for me).

And, for the first time in more than 80 quilts, I lost at binding bingo!! 😂 So I spent a bit of extra time making and attaching one more short bias binding strip.
Washing:

I machine washed the finished quilt twice (cold water, no bleach) using dye trapping sheets (I like either Color Catchers or Color Grabbers), which absorbed a lot of the dark fabric dyes. (Those blue-ish sheets used to be white!)


After washing, the quilt is soft, scrunchy just enough, and has beautiful wrinkles. I hope it will be a keepsake that is used and loved for a long time to come.
💐QUILT SUMMARY:💐
I machine pieced this quilt on my Bernina 240.
I quilted this quilt on my Janome QMP-18 long arm.Finished size: 59" x 58"
Front piecing: 36 blocks, each made up of 6 "slats": 3 batik and 3 black+white. Inspired by Karen Brown's "Colour Slat Quilt".
Back: A wide black and white floral print called "Mini Daisy".
Binding: Black-on-black continuous bias binding, attached by machine.
Quilting: Edge-to-edge "Sticky Buns" by Anne Bright Designs. Thread used on the front and back is "Black" (So Fine 50 #411).
What a wonderful job you did! The quilt is gorgeous!
ReplyDeleteThank you so much!
DeleteYour quilt is beautiful! Thank you so much for all the information. I love your blog.
ReplyDeleteThank you for that!
DeleteThank you, Angie, for the beautiful keepsake .I'm sure it will bring me a smile every time I look at it.
ReplyDeleteKay C
You are so welcome, Kay.
Delete