Rainbow Scrappy Improv Couch Quilt
I machine pieced this quilt on my Bernina 240.
I quilted this quilt on my Janome QMP-18 long arm.
Finished size: 75" x 75"
Finished size: 75" x 75"
(click on photos to enlarge)
🌈FINISHED QUILT:🌈


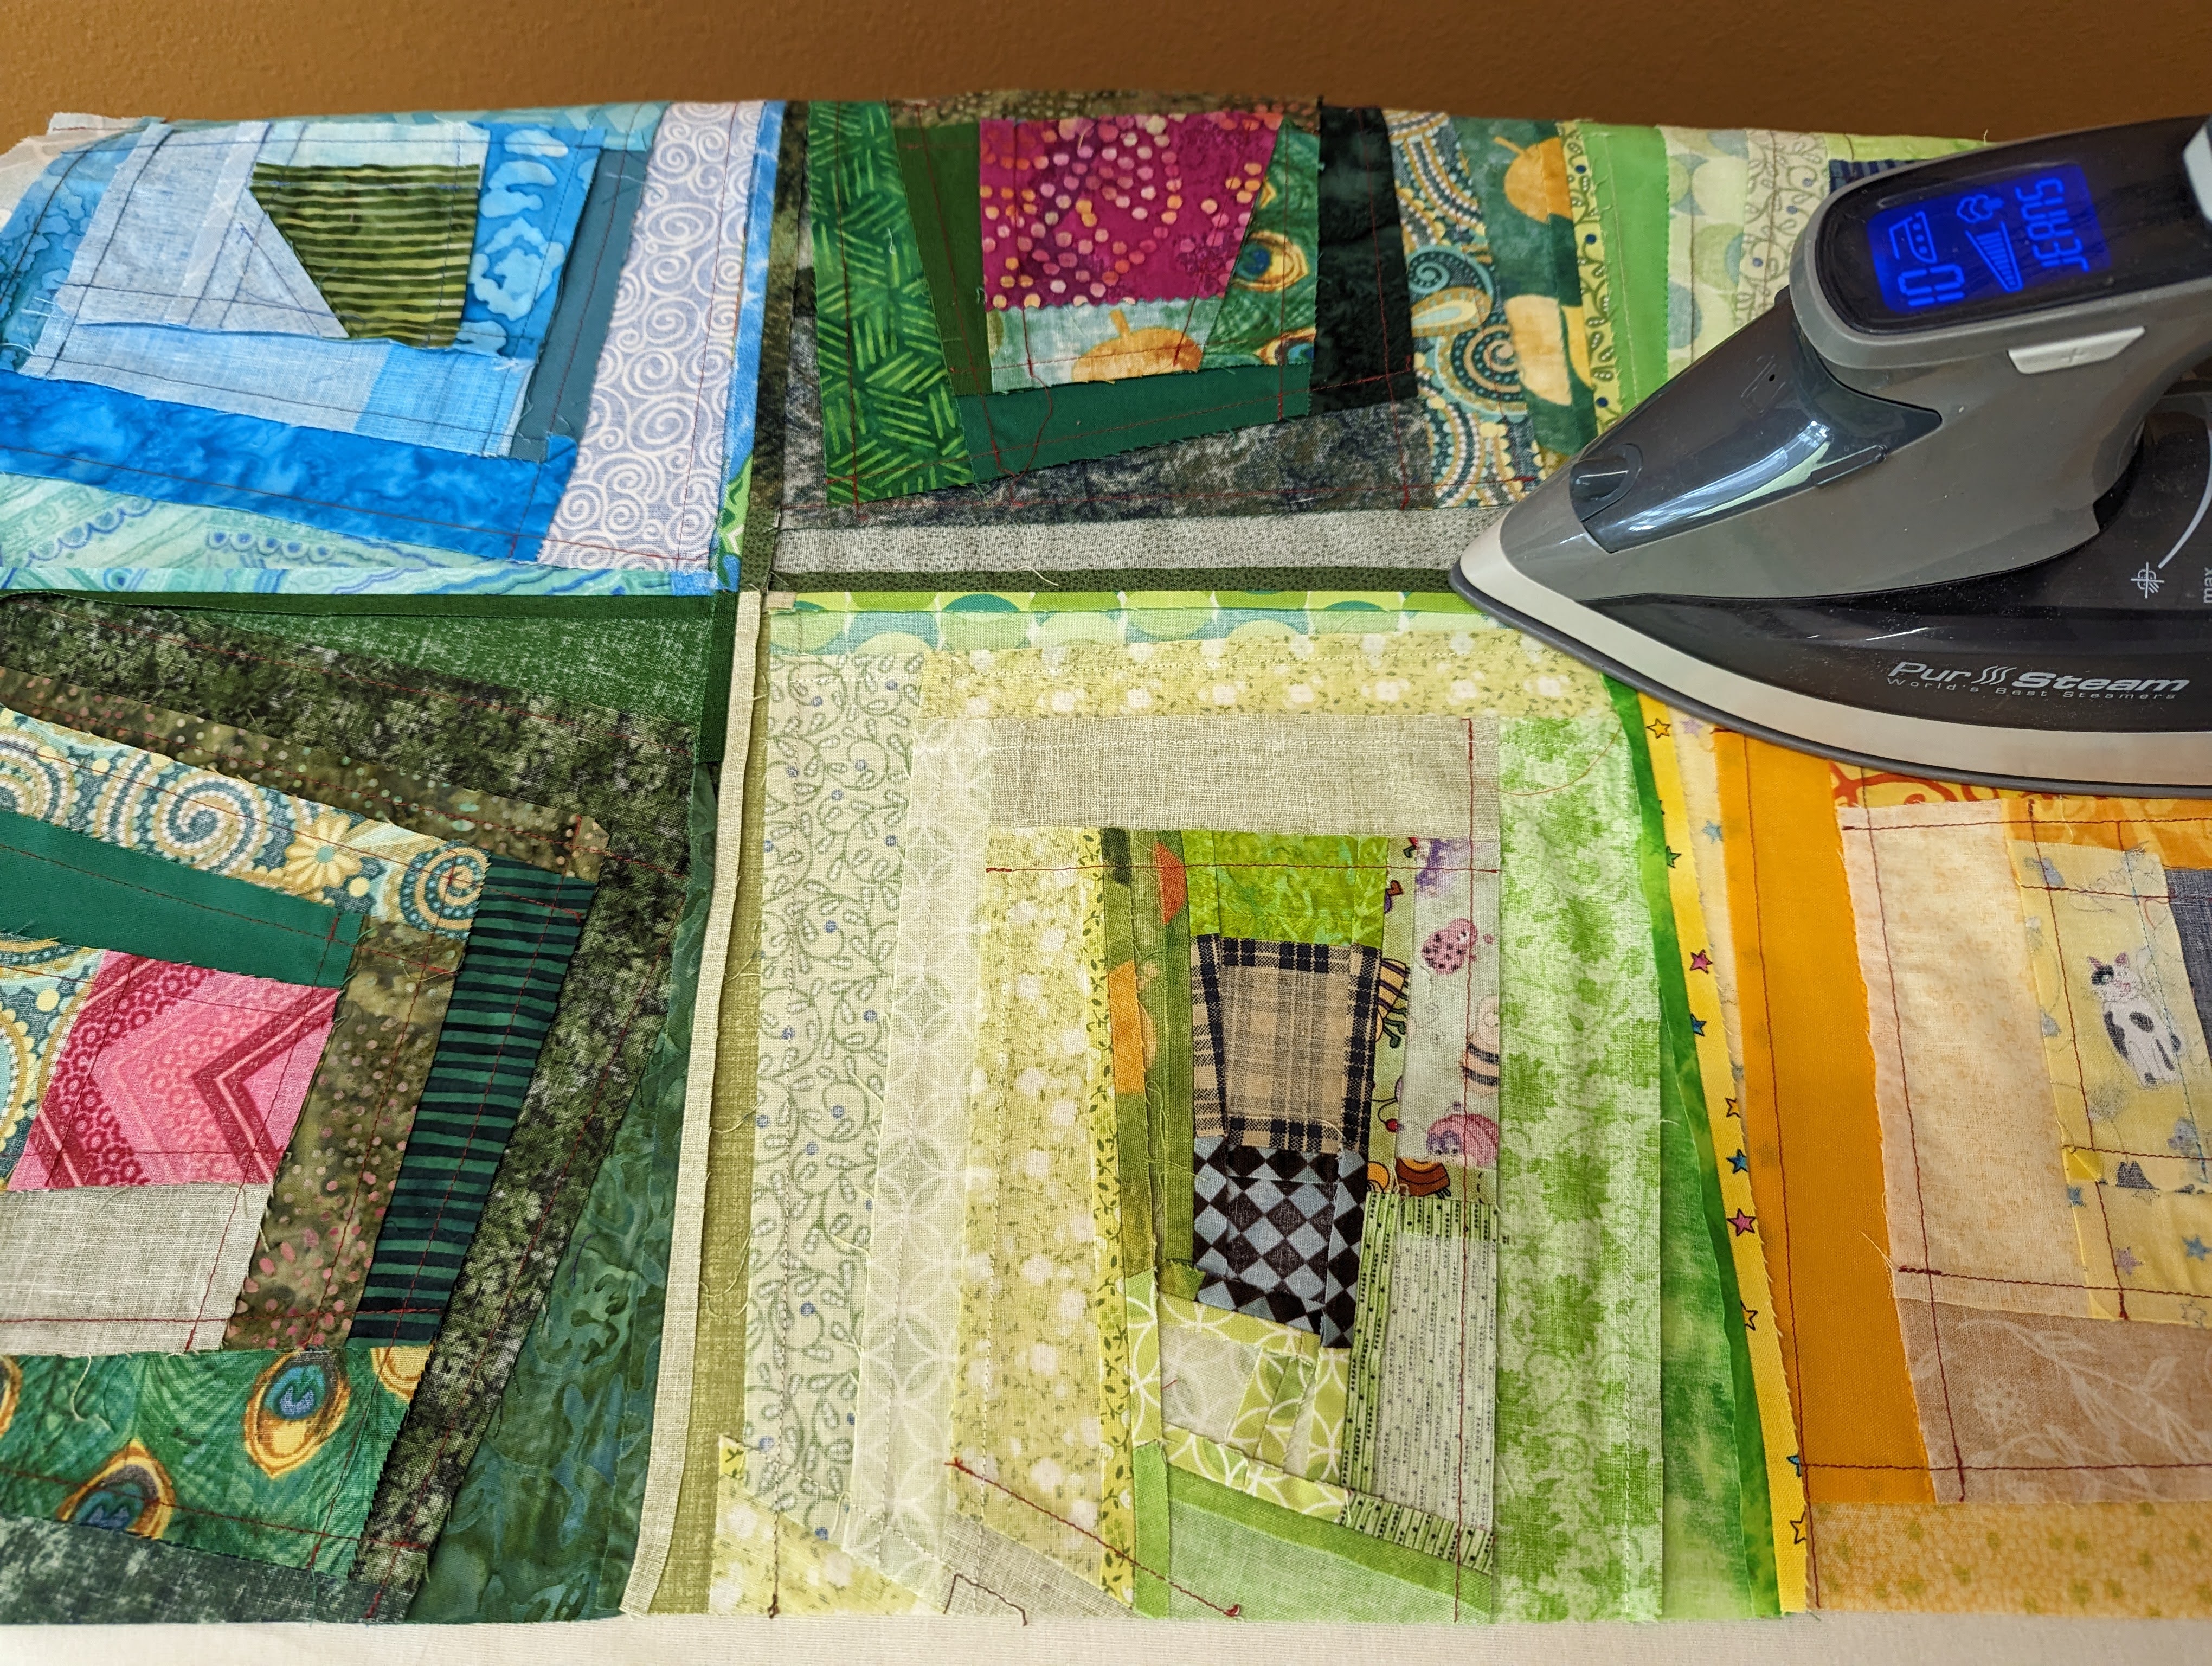
Front piecing: Using a scrappy, improvisational technique, I "built" 49 color-themed blocks (9.5" square) and arranged them in a 7x7 grid. Every piece of fabric in these blocks was from my scrap and strip stash, or given to me from scrap stashes of quilting friends. Less fabric in the landfills, more fabric in a cuddle quilt!
Border: A narrow 1" inner border of solid aqua cotton is followed by a 6" wide border, all framing the color block center grid. For the wide border, I used some yardage I purchased at an estate sale: it is a gorgeous celestial design created by Gail Cadden for Timeless Treasures.


Backing: This is a pieced quilt back that I made starting with a center row of the scrappy, improv color blocks, then adding vertical stripes of various aqua shades from my yardage (as well as the kind contributions from a quilting friend's stash, too!) and a few more rows of colorful scrap fabric blocks. Pieced backs can take so much more time to make than simply using full yardage pieces, but the look is unique and the process very satisfying.

Quilt Stitching, Pattern: I quilted using edge-to-edge "Meandering Feathers" from Wasatch Quilting.

Quilt Stitching, Thread: I used a lighter "It's a Boy" (So Fine 50 #435) thread for the front of the quilt.


Label: I embroidered a short message, my initials, and the year right onto the binding, one of my favorite ways to label a quilt.

Binding: I used a combination of scrappy aqua fabric strips for the binding of this quilt, attached by hand.
🌈PROGRESS PHOTOS:🌈
Construction - Blocks:


🌈🌈🌈
Another example of useful scraps: A few months ago I bought fabric bolts (at a great discount) from an Etsy store that was closing. They asked if I wanted them to include several pieces of fabric that were left from cutting out pattern pieces for masks and surgical caps, and I told them absolutely! Those scrap pieces worked wonderfully to make some color blocks in this quilt, too!
🌈🌈🌈
I also frequently like to take several smaller fabric pieces of similar patterns, sew them together, press the seams, and create strips for building the blocks:


Construction - Block Arrangement:

Like a lot of the projects I make, I started not knowing exactly where I was going to end up.😊
I knew I wanted the final size of the quilt to be at least 75" square, and I knew I wanted to use the colors of the rainbow cascading diagonally. Eventually, the quilt's corners became black (top left) and white (bottom right), but when I began to place the blocks on my design wall initially, the layout didn't start that way. The organic evolution that happens when I create a quilt this way is always a big plus for me!

Construction - Borders:
I began auditioning yardage from my fabric stash to make the quilt's border. I first tried out some black and white prints, but they definitely did not provide the effect I was going for:

Then I pulled a very colorful print with a black background, and I was just certain it was going to be the right choice! I tried it alone, and then I tried it with a black, a lime, and finally a yellow narrow inner border, but it still wasn't right.


🌈🌈🌈
A good friend and fellow quilter told me she thought that using black wasn't the right choice for this quilt, and she was correct. Normally a black border can be very striking (as in this quilt or this quilt or this quilt I made), but in this case, she suggested I use a bright color (such as aqua, yellow or bright green) that would pull the brightness from the multi-color blocks, rather than reflect a darker, less-clear tone. I started experimenting with the vibrant, celestial Timeless Treasures yardage I had purchased at an estate sale. I loved the look.

Then I tested a few colors for the narrow inner border, and I liked the aqua the very best, so I combined it with an aqua binding and auditioned it with each of the four corners of the quilt blocks to be sure it worked - and it did!!
🌈🌈🌈

After the border fabrics were chosen, I carefully measured and attached the 1.5" inner border (finished to 1" once sewn).

Once the aqua border was done, I started attaching the lovely Timeless Treasures celestial border. I always attach side borders first, then top and bottom.

Pin, pin, pin - can't use too many pins when working with borders.

Carefully pressing every border seam flat, being sure not to distort the straight seam lines.
Construction - Backing:
Wanting to continue to use fabric yardage and scraps I have on hand, I decided I was going to piece this quilt's back. I started by making a single row of scrappy color blocks, just like the ones on the front:

Then I did some sketching, trying to decide what I wanted and how I would go about creating that look:

I decided to create vertical rows of varying widths, alternating between aqua fabrics and various rainbow colors, as well as including the remaining pieces of border fabric:

Quilting:

After loading the backing (I like to roll the loaded quilt back and forth between the back and front bar a couple times, which really helps to even tension) and adding the batting, I float the top to be sure everything is squared and ready.

Then I baste the rolled quilt sandwich completely, down one side, across the belly bar, and back up the other side, advancing and repeating, before I actually quilt it.

I used my ProStitcher software to resize, repeat, and wrap the edge-to-edge "Meandering Feathers" from Wasatch Quilting. The design is loose, swirly, and flowy, which is a great compliment to the straight lines and sharp angles of the pieced blocks.

Beginning the first of 9 rows.

Very happy with how the lighter blue thread on the top doesn't take away from the blocks' rainbow colors, and the bolder aqua thread on the backing provides a pretty contrast, showing off the quilt stitching pattern.


The last and final 9th row.
Trimming:

I lined up my ruler to cut exactly 6" from the outer side of the inner narrow border. That way the quilt's outer edge will be parallel to the squared quilt.
Binding:

I joined together several different 2.5" strips of various aqua fabric (some leftover from the backing, some from other previous projects) until I had a total of about 330" of binding strips. Then I ironed them in half.


First I attached the binding fabric to the front of the quilt, using my sewing machine and a 1/4" seam...

...then I wrapped the binding around to the back of the quilt and hand-stitched it in place with an invisible stitch.

I used the leftover thread from the longarm bobbins, so that there's a perfect match to the quilt's colors, and nothing goes to waste.

Four hours later and the hand-sewn binding is done!
Washing:

I machine washed the finished quilt twice (cold water, no bleach) using dye trapping sheets (I use either Color Catchers or Color Grabbers). I never gift a quilt without washing it first, so its texture will show to the fullest and its softness can be enjoyed immediately by the recipient.

After washing, the quilt is soft and wrinkly and scrunchy, perfectly ready to be used and loved.
🌈QUILT SUMMARY:🌈
I machine pieced this quilt on my Bernina 240.
I quilted this quilt on my Janome QMP-18 long arm.Finished size:75" x 75"
Front piecing: 49 rainbow-color-themed blocks (9.5" square) arranged in a 7x7 grid, using a scrappy, improvisational technique.
Border: One narrow 1" aqua border, followed by a 6" wide celestial print.
Back: Pieced, with a center row of the scrappy, improv color blocks, and added vertical stripes of various aqua shades on each side.
Binding: Hand-sewn scrappy aqua toned cottons.
Quilting: Edge-to-edge "Meandering Feathers" from Wasatch Quilting. "It's a Boy" (So Fine 50 #435) thread on the front, and "Glacier" (So Fine 50 #471) on the back.
wonderfully shown and elucidated, thank you for sharing!
ReplyDeleteThank you for your kind comments!
DeleteThanks for the step by step info. Inspiring! Will get started very soon!!
ReplyDeleteWonderful! Thanks!
Delete