Jewel Tone Colorwash Couch Quilt
Machine pieced on my Bernina 240 & Pfaff 710,
and quilted on my Janome QMP-18 long arm.
Finished size: 72" x 76"
(click on photos to enlarge)
✨FINISHED QUILT:✨.jpg)


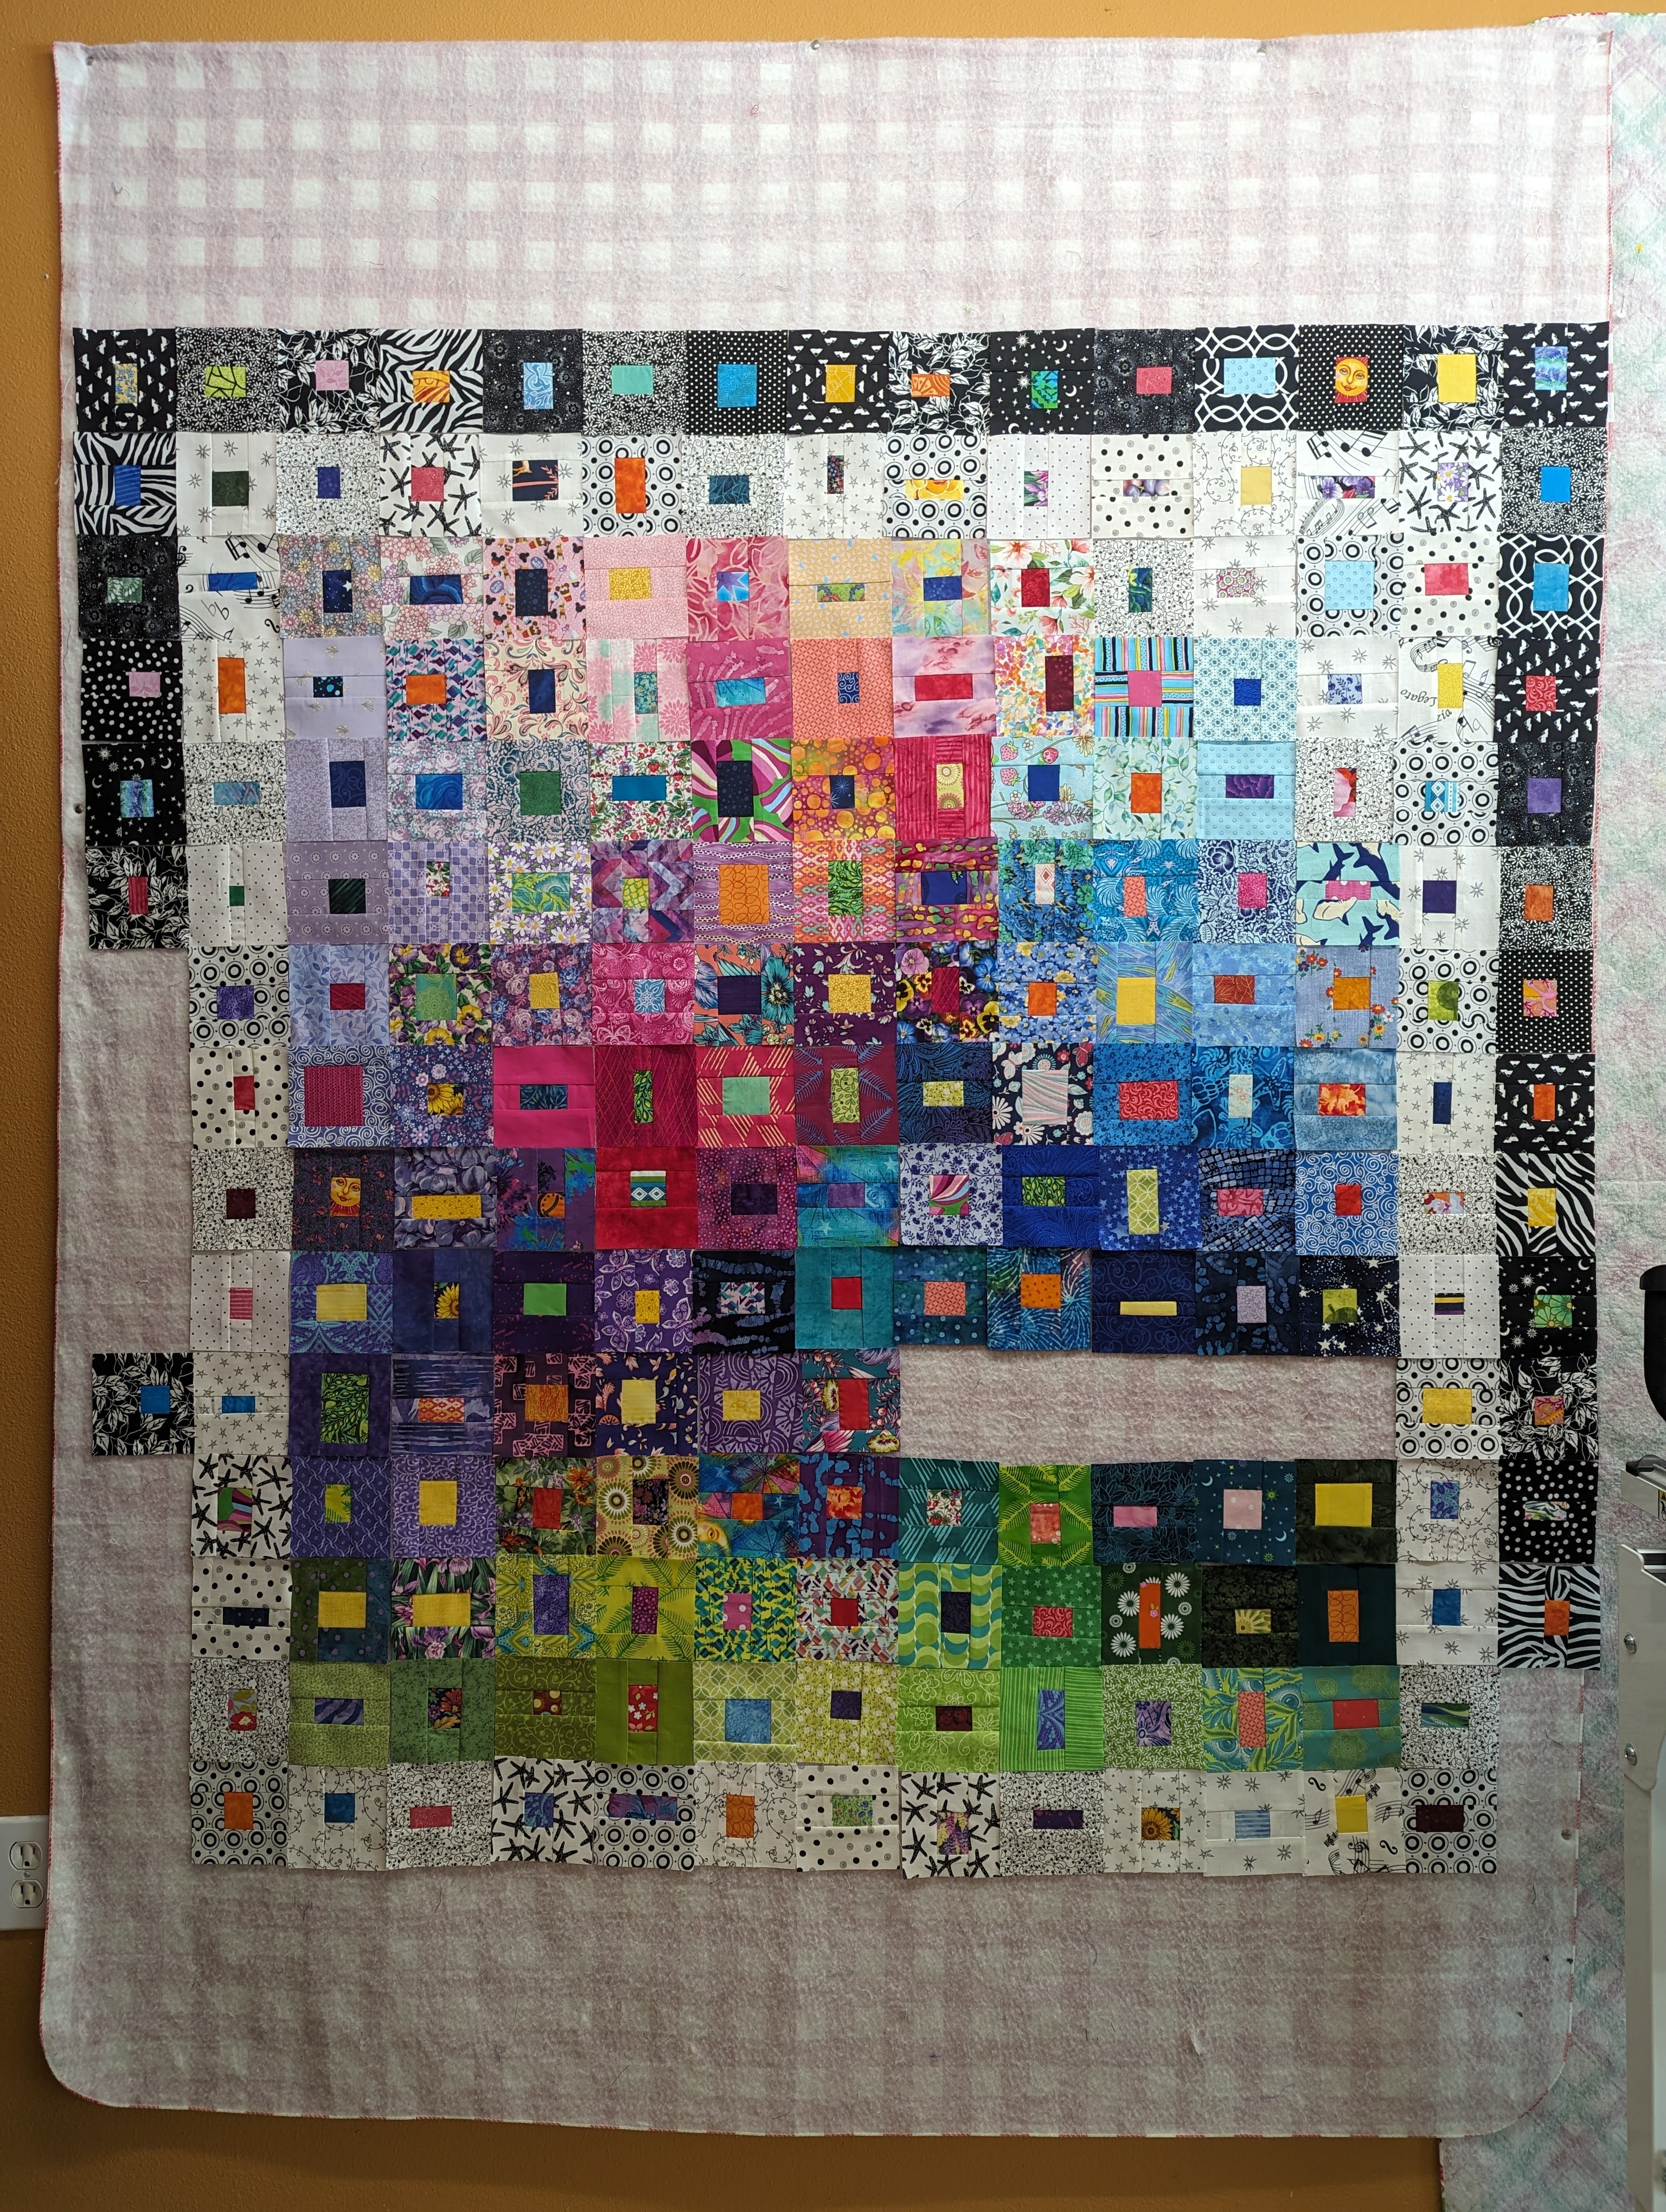
Front piecing: This is my first quilt made using Terry Rowland's colorwash technique. I slightly revised her method, making my blocks a little larger, and arranging them with a visually obvious border (whites--> grays--> blacks). The finished grid is 17 x 18 blocks (4" each). Each piece of fabric in these 306 blocks was from my scrap and strip stash, or given to me from scrap stashes of quilting friends. More fabric in a cuddle quilt, less fabric in the landfills!
Border: I added a 5" outer solid true black Kona cotton border.


Backing: The lovely backing fabric is yardage of a jewel-toned zentangle print I recently purchased at a discounted cost from an Etsy store that was closing.

Quilt Stitching, Pattern: I quilted using edge-to-edge "Don't Leaf Me" from Wasatch Quilting.

Quilt Stitching, Thread (front): I used "Genoa Gray" (So Fine 50 #503) thread for the front of the quilt. I wanted the quilting design to show up well on the black borders, but get a bit "lost" when stitching on the actual blocks, to allow all of the fabric colors to shine.

Label: I embroidered a short message on a neutral gray square and placed it on the back of the quilt when attaching the binding by hand.

Binding: I used more of the backing fabric for the binding of this quilt, attached by hand.
✨INSPIRATION:✨
I've been blessed with three amazing gifts: time, talents and tools - all the ingredients needed to be able to craft, create and gift to others, hoping to add a bit of joy into people's lives.
I'm pretty selective about what I choose to ingest from social media, but someone I really enjoy watching is Kendahl Landreth. She has been gifted with a sense of humor that just tickles me. Not only does she entertain, but from time-to-time she also shares about her personal life, and I really respect her for that! Her social media is funny and genuine, and I wanted to show her my appreciation by gifting her a handmade quilt. I specifically decided on the colorwash design, since it is a blend of so many different yet gorgeous colors. Not one color is better or prettier than another - they are each lovely in their very own way.

✨PROGRESS PHOTOS:✨
Construction - Blocks:

Inspired by Terry Rowland's colorwash technique, I began going through my scraps and strips, initially only pulling fabric pieces that were between 1.5" and 2" wide. I made a point not to use any repeated prints when making the colored squares (although there are repeats of some fabrics for the centers of the squares).

However, I quickly banned the idea of measuring, and instead started making the squares using several differently sized fabric pieces (usually creating off-centered middle rectangles and squares), choosing to instead cut the square down to size after all 5 pieces had been sewn together. Quicker and more freeing!

As I continued to create the 4" squares, I began sorting and laying them out by color and value.

That's when I realized I was choosing almost exclusively jewel tones (main colors of green, blue, pink, purple with yellow and orange accents). So I decided to continue with that theme for the quilt's entire center.

I kept selecting individual fabrics for each outer square, no two alike...

...and I did a lot of chain piecing to keep the square count increasing!

Construction - Block Arrangement:

As with so many other quilts I've made, I started with a very broad idea, not knowing exactly where the finished quilt would end up.😊
I just began to place finished 4" blocks on my design wall, and as I kept adding blocks and moving them around, I realized I wanted to have some definition around the entire arrangement - so I initially planned on making a white (with black) row of squares, followed by a black (with white) row, to act as an inner border.

As I worked on adding the white and black outer rows, I began focusing on a finished size for the quilt. I had to reposition and add several more colorful squares to even begin to approach the goal of the quilt being at least 70" long.
I continued to dig through my scraps, make squares, and slowly fill in the blank areas to grow the quilt's size.

Even after the colored square section was complete, I realized I still wasn't getting to the size I wanted! So I decided to add a row of gray (with white) squares in between the white and black rows.

Finally I was happy with the layout and size of the colorwash portion of the quilt, since it had now reached the potential to be at least 70" once a 5" outer border was added!
Construction - Webbing:

I used another new technique I learned from watching Terry Rowland: joining blocks together by rows and webbing as you do so.


This was now the completed colorwash portion of the quilt, with every block in the exact order it should be, and every seam square and matched. Time to add the outer border!
Construction - Borders:

I used solid true black Kona cotton for a 5" outer border. I always attach side borders first, then top and bottom.

Top is finally finished! Ready to be quilted on my long arm.
Construction - Backing:

I joined together two pieces of a jewel-toned zentangle print, each 43" wide by 78" long, making an 86" x 78" backing.
Quilting:

After loading the backing (I like to roll the loaded quilt back and forth between the back and front bar a couple times, which really helps to even tension) and adding the batting, I float the top to be sure everything is squared and ready.

Then I baste the quilt sandwich completely, down one side, across the belly bar, and back up the other side, advancing and repeating, before I actually quilt it.

I used my ProStitcher software to repeat, wrap and crop the edge-to-edge "Don't Leaf Me" from Wasatch Quilting.

Beginning the first of 9 rows.


I discovered more fullness right in the center of the quilt; with so many seams from joining together more than 300 - 4" squares, that isn't too surprising. I used the "soup can" or "water bottle" trick to gently ease the quilting across the fabric before and after the area of the fullness. Worked great!

The start of the 9th and last row.
Trimming:

I lined up my ruler to cut exactly 5" from the outer side of the inner row of black squares.That way the quilt's outer edge is parallel to the squared colorwash portion of the quilt.
Binding:

I cut 2.5" wide strips from the backing fabric, and joined them together until I had a total of about 310" of binding. Then I ironed the completed strip in half.

First I attached the binding fabric to the front of the quilt, using my (new to me) Pfaff sewing machine and a 1/4" seam...

...then I wrapped the binding around to the back of the quilt and hand-stitched it in place with an invisible stitch. I used the leftover thread from the longarm bobbins, so nothing goes to waste.

Almost 5 hours later and the hand-sewn binding is done!
Label:

I recently purchased a (new to me) Pfaff Expression 710. First thing I taught myself to do was create an embroidered label.

I then folded under the label's edges, placed some Heat'n'Bond on the square, pinned it in place, ironed it on, and finished by attaching it by hand, sewing it along with the binding in that corner.
Washing:

I machine washed the finished quilt twice (cold water, no bleach) using dye trapping sheets (I use either Color Catchers or Color Grabbers). I never gift a quilt without washing it first, so its texture will show to the fullest and its softness can be enjoyed immediately by the recipient.


After washing, the quilt is wrinkly and soft and ready to be used and loved.
✨QUILT SUMMARY:✨
I machine pieced this quilt on my Bernina 240 and Pfaff 710.
I quilted this quilt on my Janome QMP-18 long arm.Finished size: 72" x 76"
Front piecing: 306 - 4" blocks arranged in a 17 x 18 grid, using Terry Rowland's colorwash technique.
Border: One wide 5" solid black Kona cotton border.
Back: A jewel-toned zentangle print.
Binding: More of the jewel-toned zentangle backing fabric, attached by hand.
Quilting: Edge-to-edge "Don't Leaf Me" from Wasatch Quilting. "Genoa Gray" (So Fine 50 #503) thread on the front, and "Black" (So Fine 50 #411) on the back.
I am so pleased you joined my scrap challenge and made this magnificent colorwash quilt. Well done
ReplyDeleteThank you, Terry!
Delete