Blue & Gray Mountain Baby Quilt
I machine pieced this quilt on my Bernina 240.
I quilted this quilt on my Janome QMP-18 long arm.
Finished size: 56" x 56"
Finished size: 56" x 56"
(click on photos to enlarge)
🏔FINISHED QUILT:🏔


Front piecing: Sixteen "Twisting Rail" blocks in shades of blues and grays, with novelty prints in mountain themes.
Borders: One narrow white inner border, followed by a 6" pieced wedged border and curved corners.
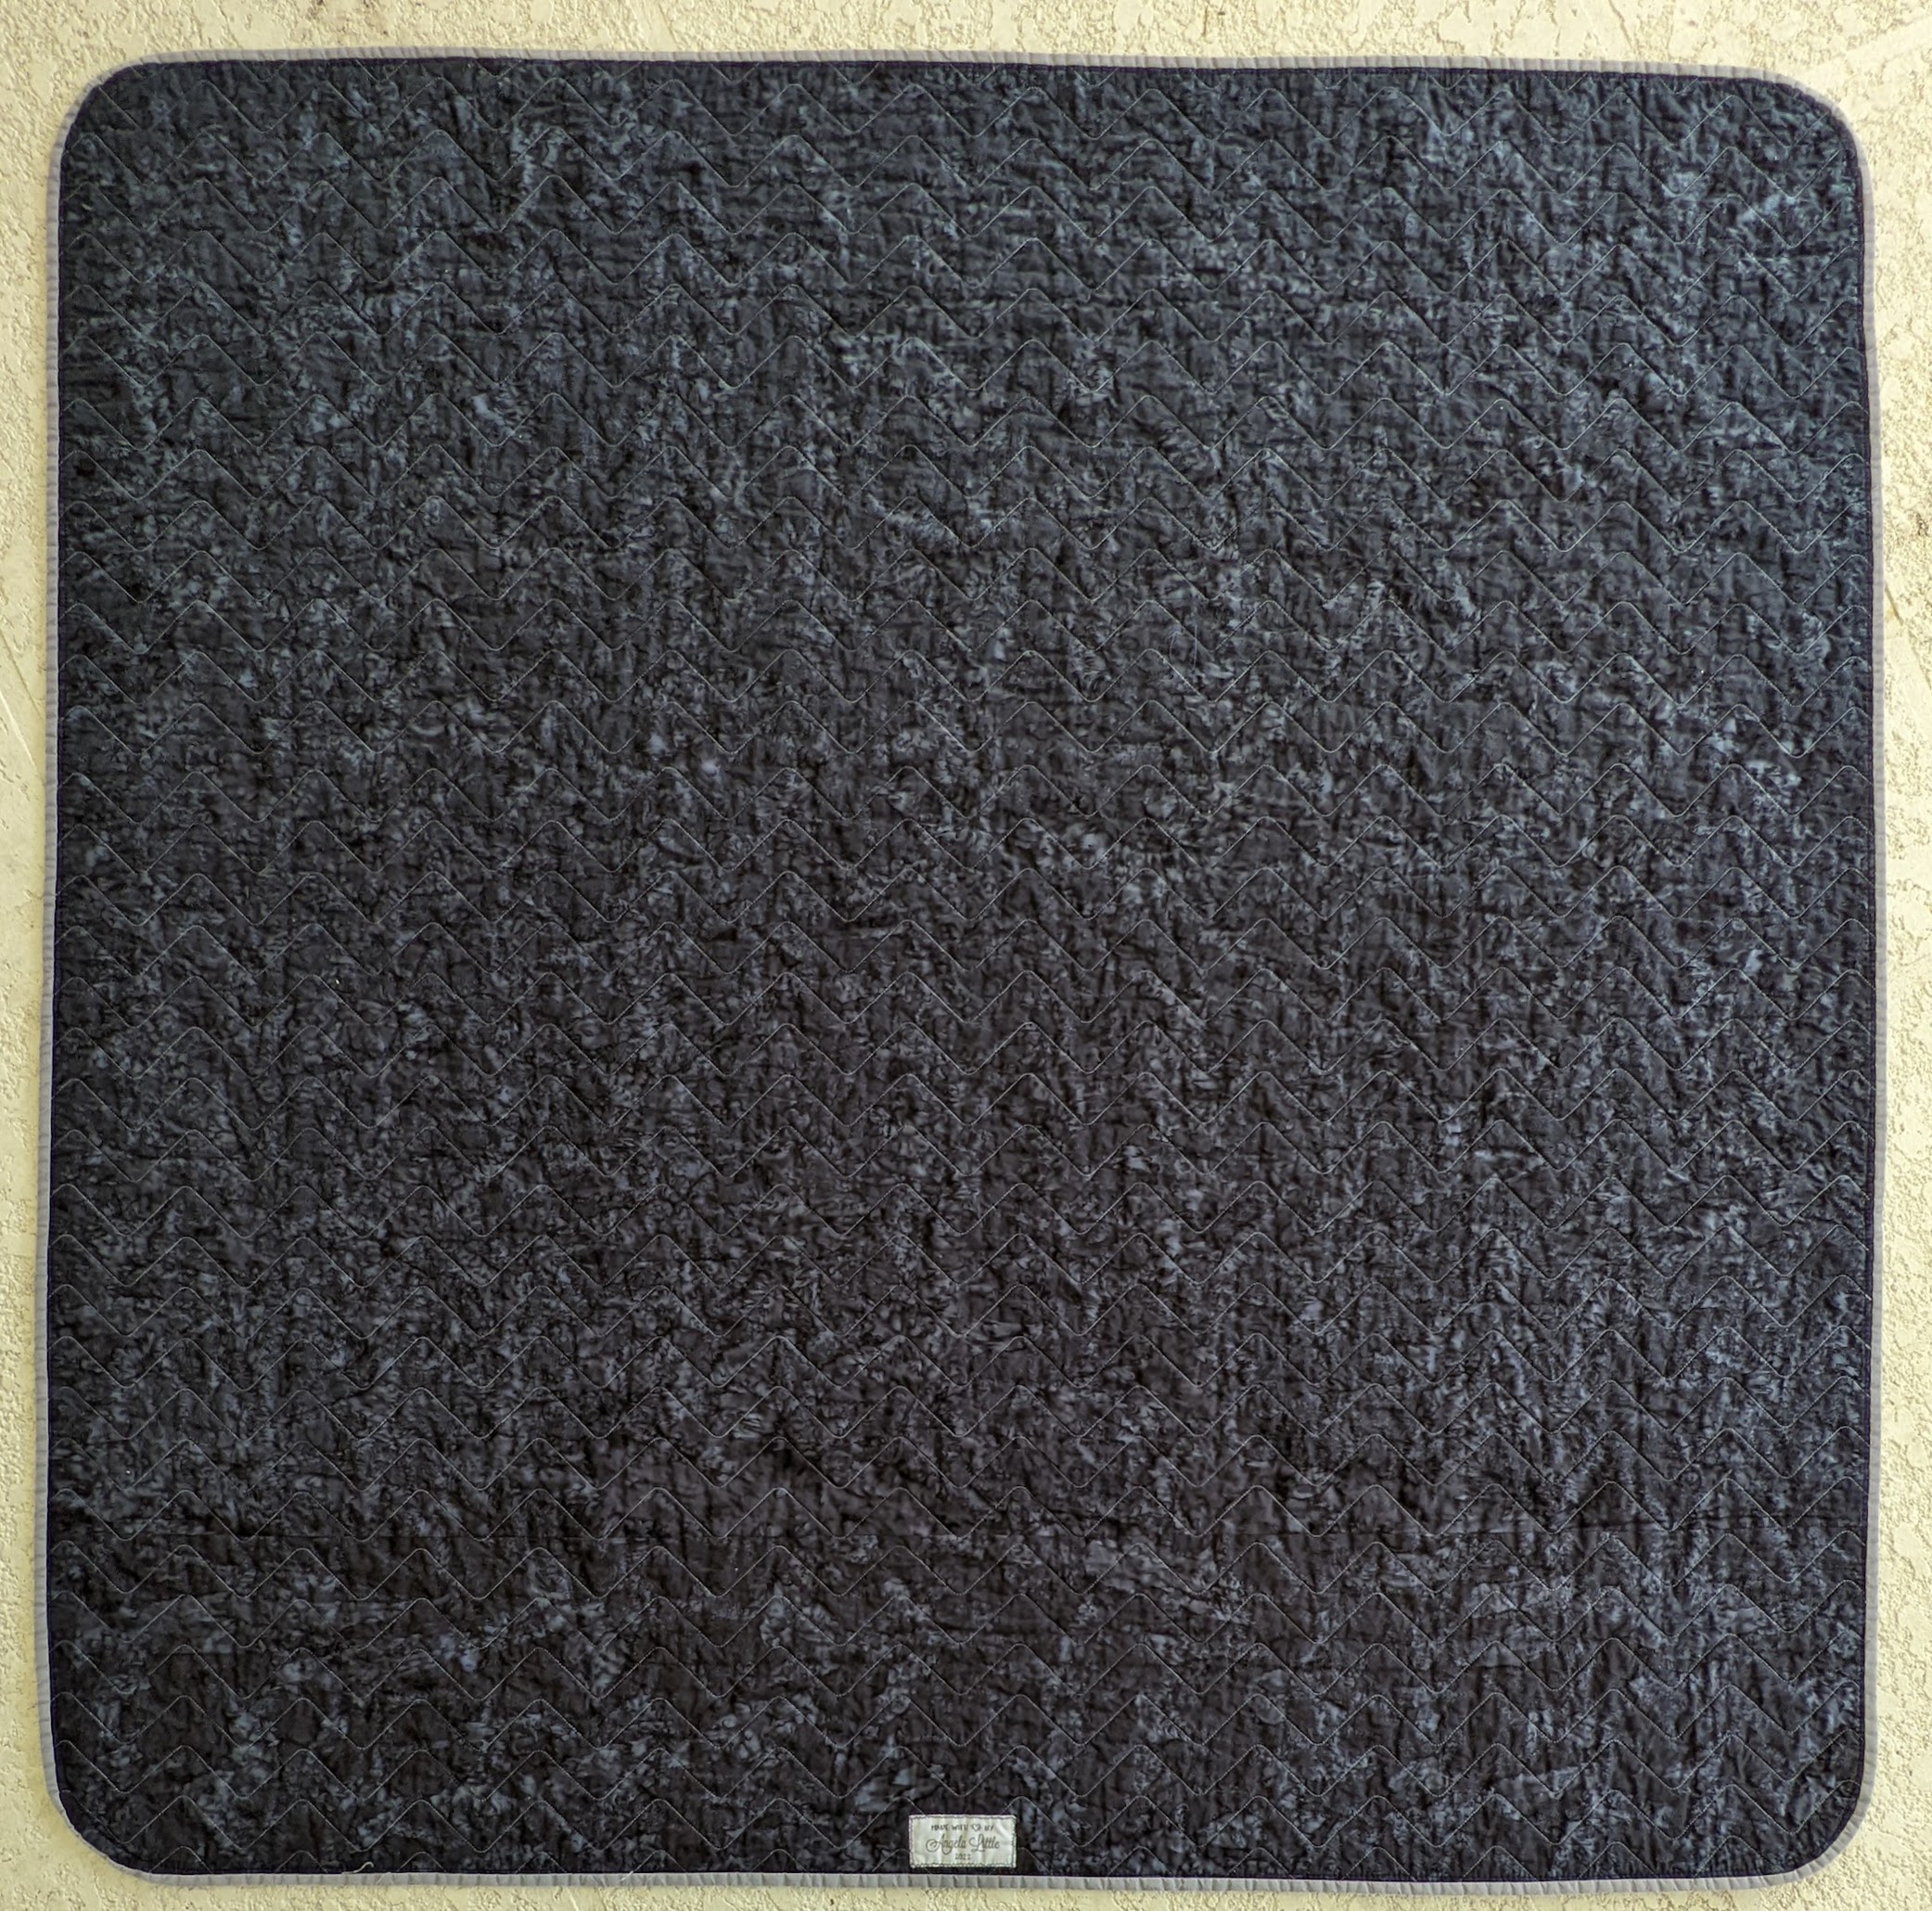
Backing: The back is a gorgeous dark gray-blue batik. Perfect for this quilt.
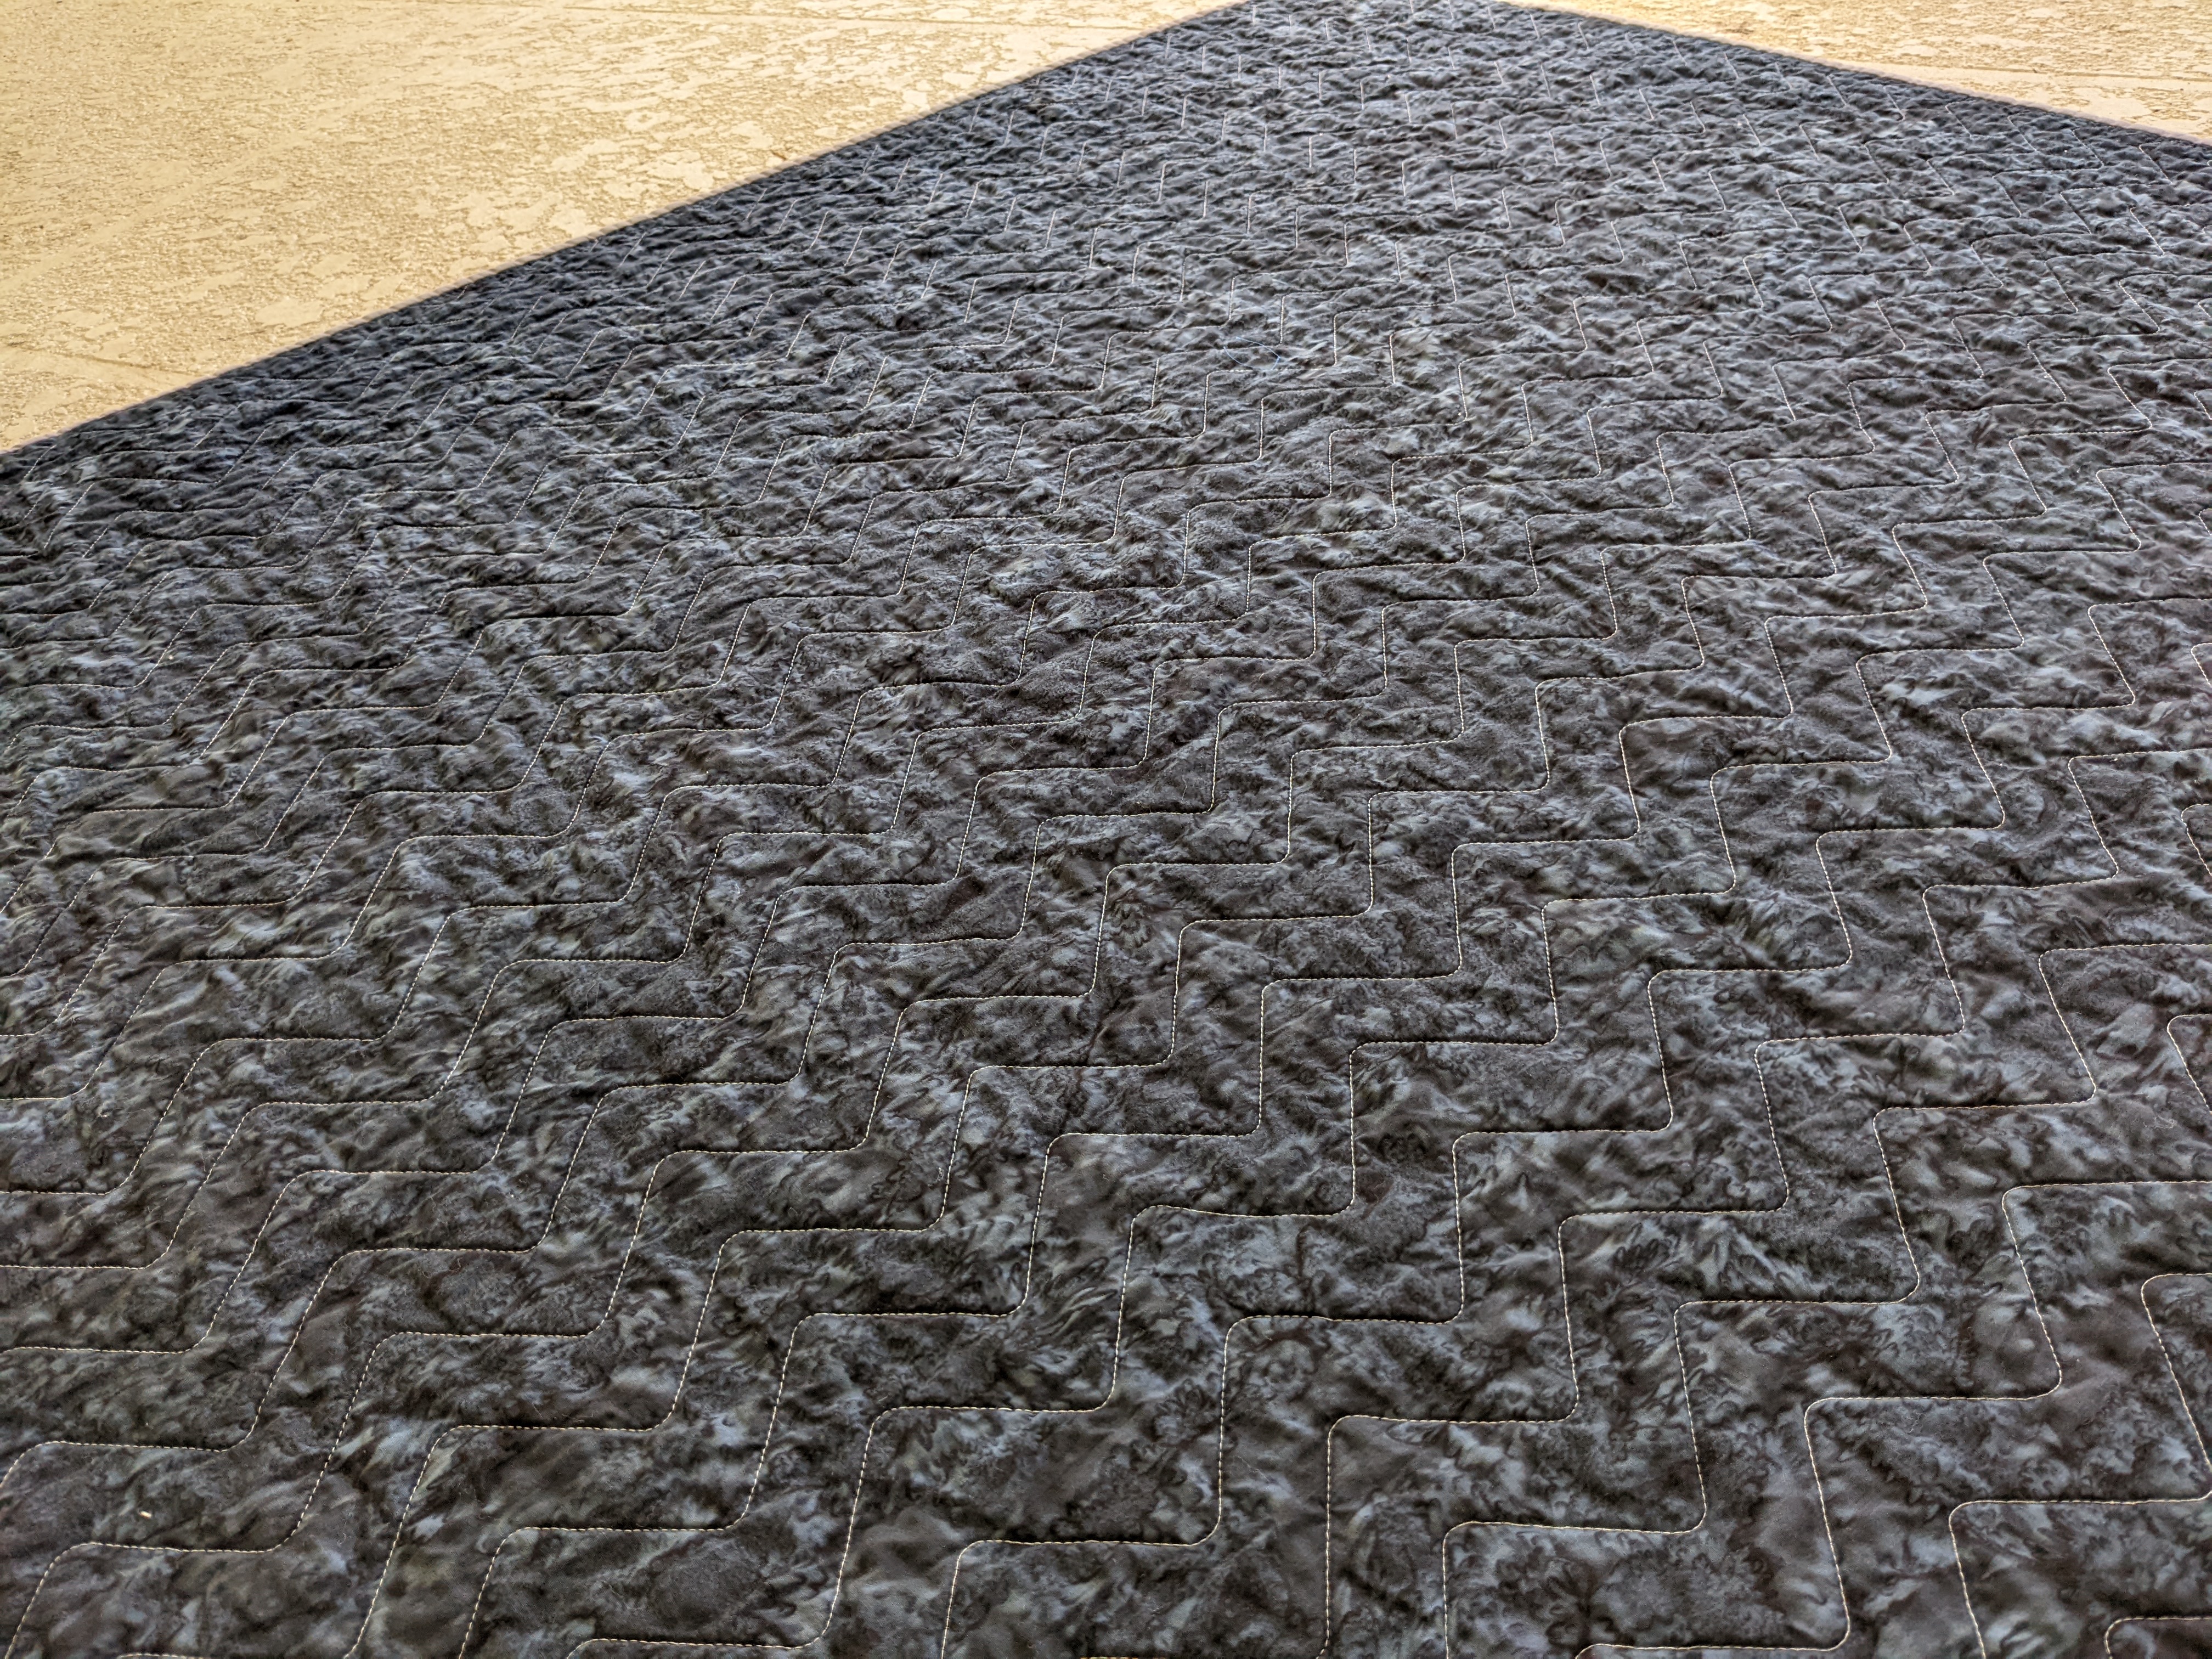
Quilt Stitching, Pattern: I quilted using "Square Waves" (627 Handiworks) digital pattern - setting the rows of stitching parallel to each other to resemble mountain peaks.

Quilt Stitching, Thread (Front): I used a very soft light gray thread called "Genoa Gray" (So Fine 50 #503) for the front of the quilt.
Quilt Stitching, Thread (Back): I used a neutral thread called "Silver" (So Fine 50 #408) which gave just a slight contrast to the dark backing, accentuating the mountain peaks in the quilt stitching.

🏔INSPIRATION:🏔
Three years ago I made a Pink & Teal Woodlands quilt for a sweet baby girl. Now this quilt is being made for her soon-to-arrive baby brother! Mom and Dad requested shades of blues and grays in a mountain adventure theme.
🏔PROGRESS PHOTOS:🏔
Construction-Blocks:
I had quite a bit of gray fabric left from the backing of this quilt and this quilt. But the fabric itself was on the dark side, and I knew I wanted to add some lighter colors, since this is for a baby. I also wanted to make blocks that could incorporate colorful snippets of many blue and gray novelty fabrics I had in my scraps and my fat quarter stash.


Each block is made up of 8 pairs of fabric that are "split rails" sewn together at 45°. I began arranging different pairs together on my felt board to see if I liked the technique before I built the entire quilt center. I decided it would be perfect!

As I joined the pairs into blocks, eventually my board wasn't large enough, so I moved to the design wall.

After 16 blocks were done, I decided to start on borders.
Construction-Borders:
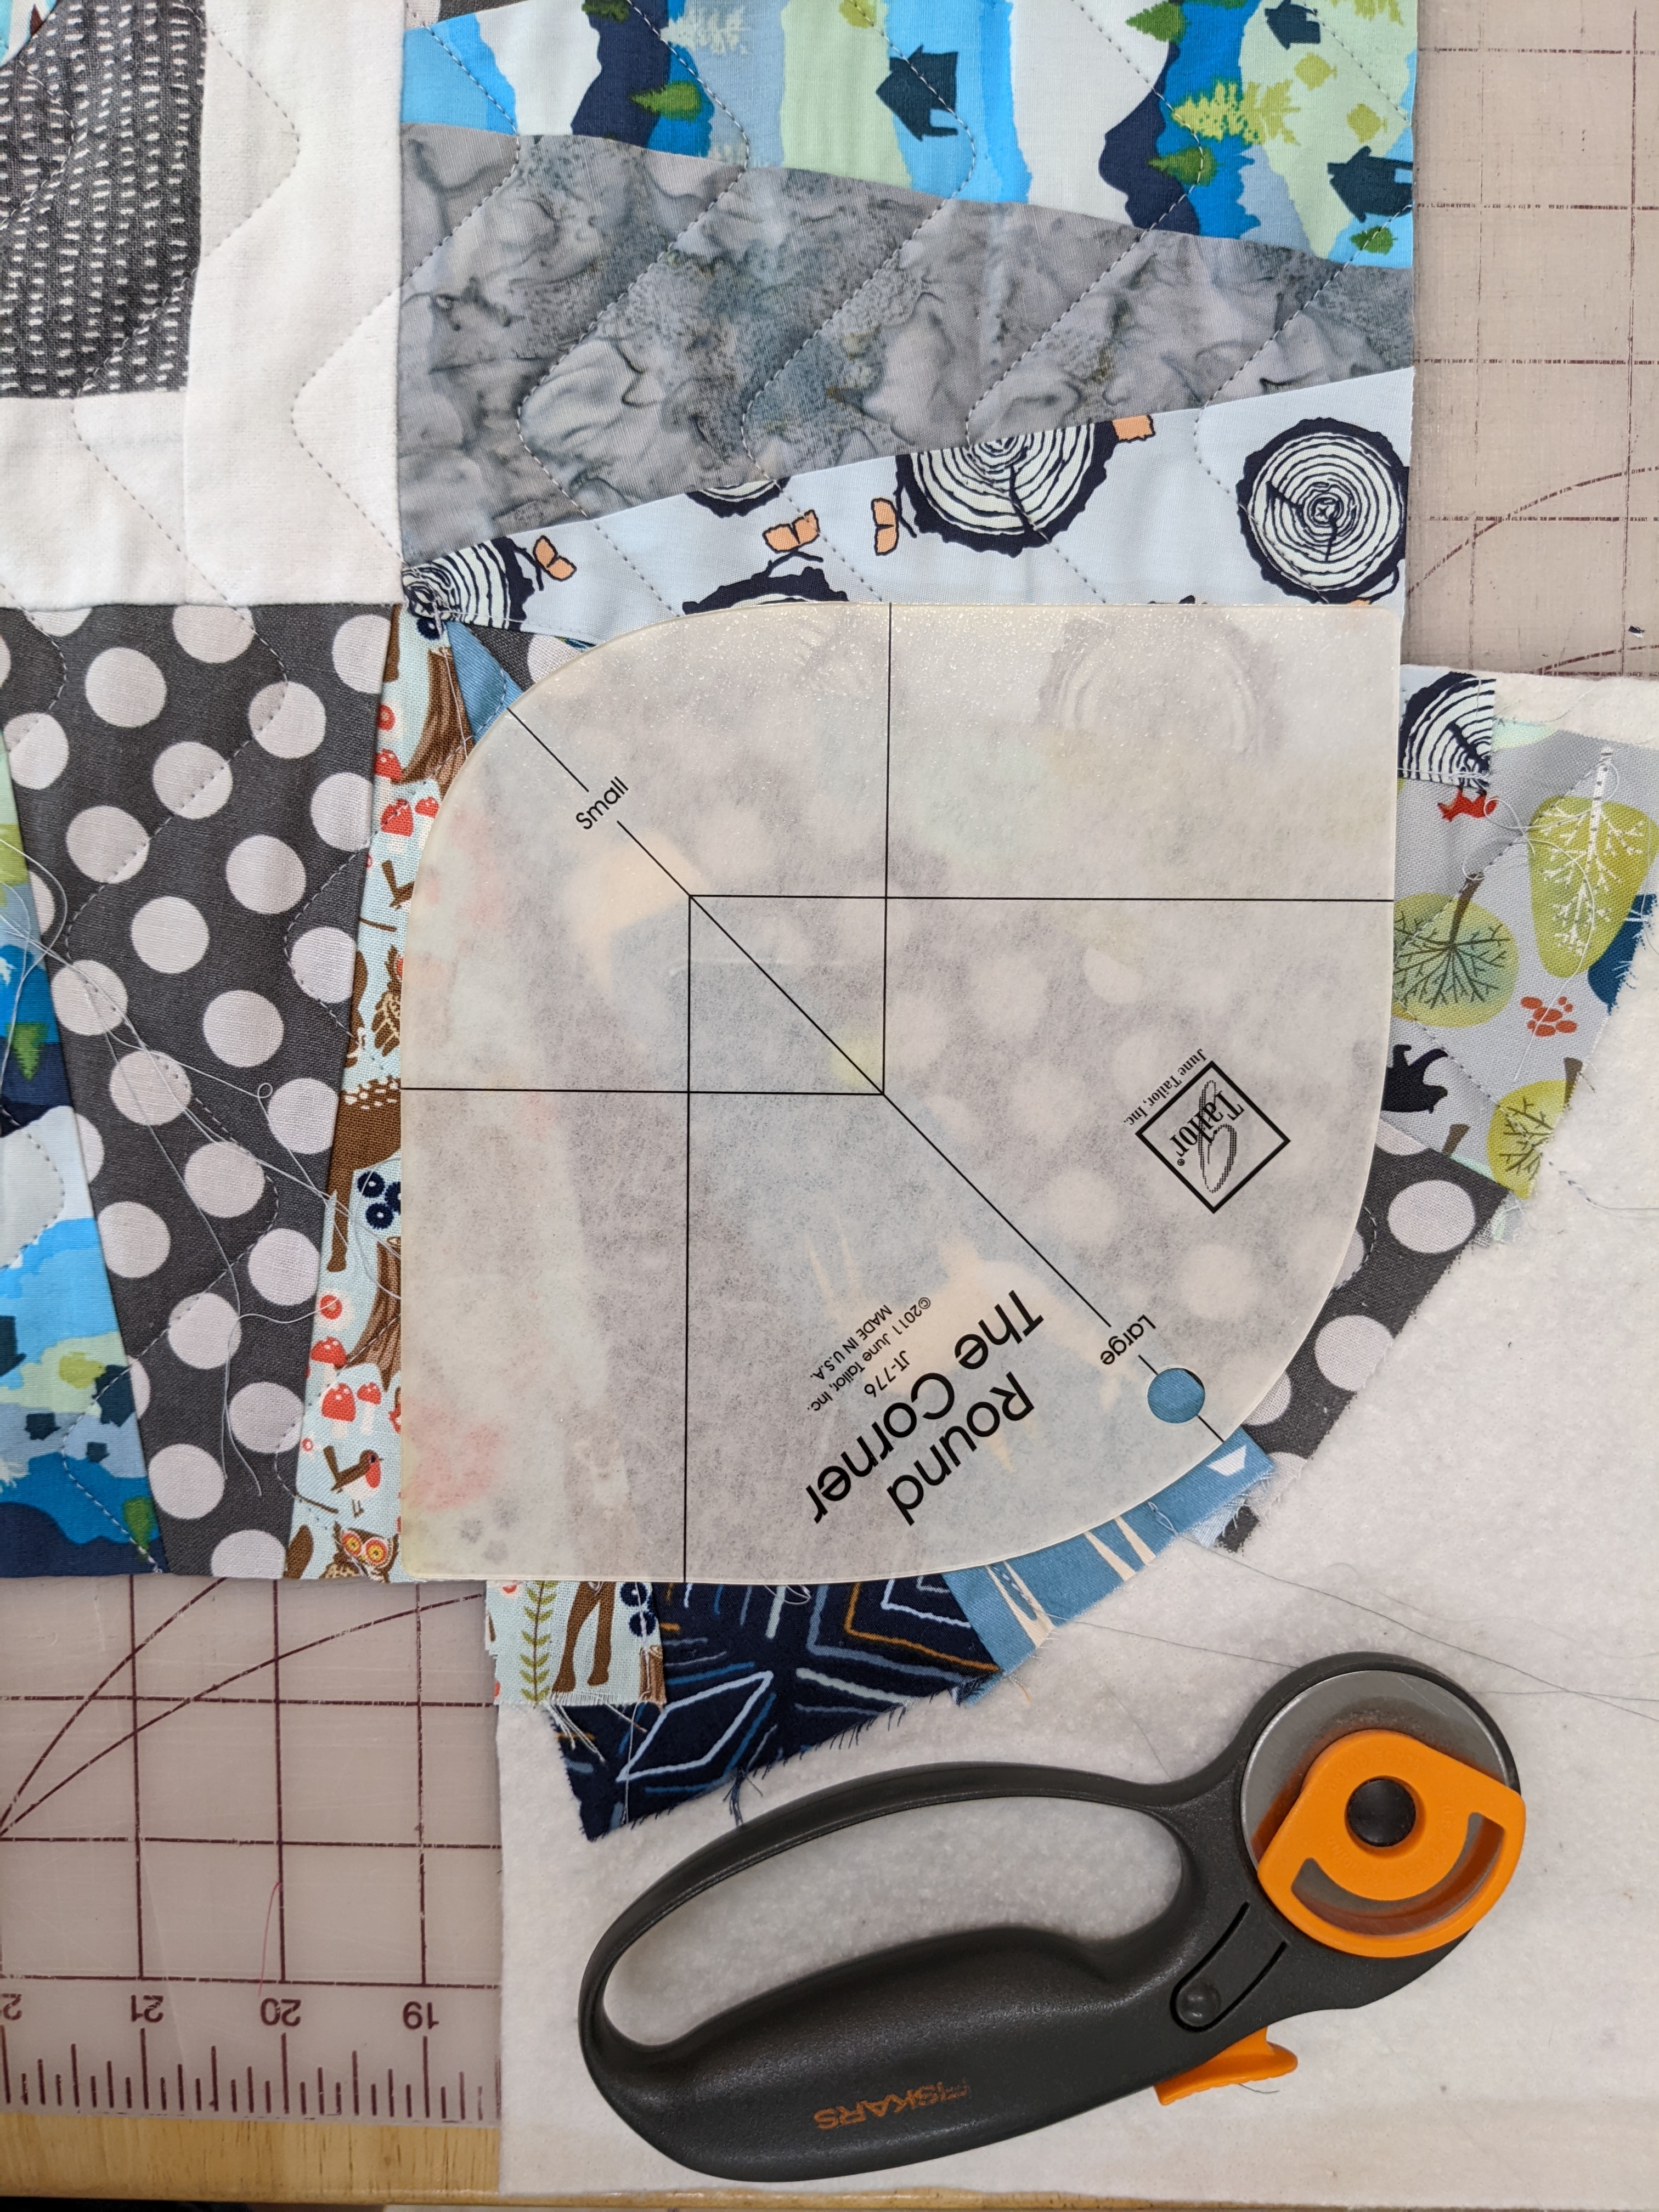
One of my all-time favorite borders is the wedge border ... I made one 3 years ago for this scrappy lap quilt and again 2 years ago for this baby quilt. It's a pretty time-intensive pieced border, and the math can sometimes be a bit challenging, but I really wanted to use that technique again this time to showcase more of the mountain-themed novelty fabrics.

I started to cut some wedges from a gray polka-dot and this lovely mountain scape print, and immediately saw that they didn't look right when placed directly next to the twisting rail blocks. I needed a narrow inner border to separate.

A great friend and fellow quilter recommended I use a white border, and she was right!

Before attaching the wedged borders to the quilt blocks, I sliver-trimmed all the edges. Takes extra time, but helps keep the final quilt nice and square.

Quilting:

The backing and batting are loaded, and the top is floated to be sure everything is squared and ready before I baste.

I chose edge-to-edge "Square Waves" (627 Handiworks). I didn't offset the rows, but rather kept them parallel to resemble mountain ranges.

Stitching the 4th of many, many rows!

Love how the "Genoa Gray" thread looks on the front of the quilt.


Getting close to the end now.

The "Silver" colored thread on the back provides just enough contrast without taking away from the dark batik's awesome pattern.

Trimming:

Squaring up the quilt after removing it from the long arm.
Binding:
The binding is a solid gray cotton, perfect compliment to this quilt's many colors and patterns.

First attaching the binding strips to the back of the quilt...

...then wrapping the binding around and sewing it to the quilt front.

Since my binding strips weren't continuous bias cut, I had to first sew a gathering stitch around each corner, then slightly draw up the gather threads to get the edges to wrap and lay flat.

Washing:

I machine washed the completed quilt twice (cold water, no bleach) using dye trapping sheets (I use either Color Catchers or Color Grabbers), which absorbed a lot of the dark fabric dyes from the fabrics, especially the batik backing.

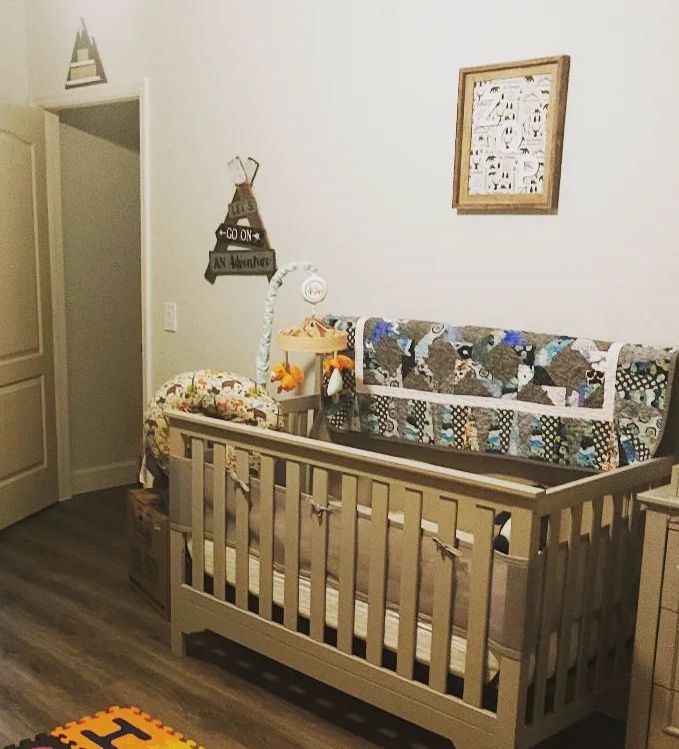
The quilt in the nursery...

and with Baby Zander!
🏔QUILT SUMMARY:🏔
I machine pieced this quilt on my Bernina 240.I quilted this quilt on my Janome QMP-18 long arm.
Finished size: 56" x 56"
Front piecing: Sixteen "Twisting Rail" blocks in shades of blues and grays, with novelty prints in mountain themes.
Borders: One narrow white inner border, followed by a 6" pieced wedged border and curved corners.
Back: Dark gray-blue mottled batik.
Binding: Solid gray cotton, attached by machine.
Quilting: Edge-to-edge "Square Waves" (627 Handiworks). Thread used on the front is "Genoa Gray" (So Fine 50 #503), and on the back is "Silver" (So Fine 50 #408).
Comments
Post a Comment