Watercolor Curved Log Cabin Floral King Quilt
I machine pieced this quilt on my Bernina 240.
I quilted this quilt on my Janome QMP-18 long arm.
Finished size: 103" x 103"
Finished size: 103" x 103"
(click on photos to enlarge)
💐FINISHED QUILT:💐


Front piecing: This king-sized quilt is made up of (100) 10" blocks built in the Curved Log Cabin (also called Uneven Log Cabin or Twisted Log Cabin) pattern. The length and width of the fabric strips used can vary, based on many different designs and desired outcomes, but I created each block using (8) 1"-wide strips of neutrals, along with (9) 2"-wide strips of florals, ranging from light to dark.
The blocks are then joined together in groups of 4 to build a 5x5 grid of larger blocks, creating a "watercolor" effect.
Border: A 3.5" wide dark green batik border surrounds the entire quilt.
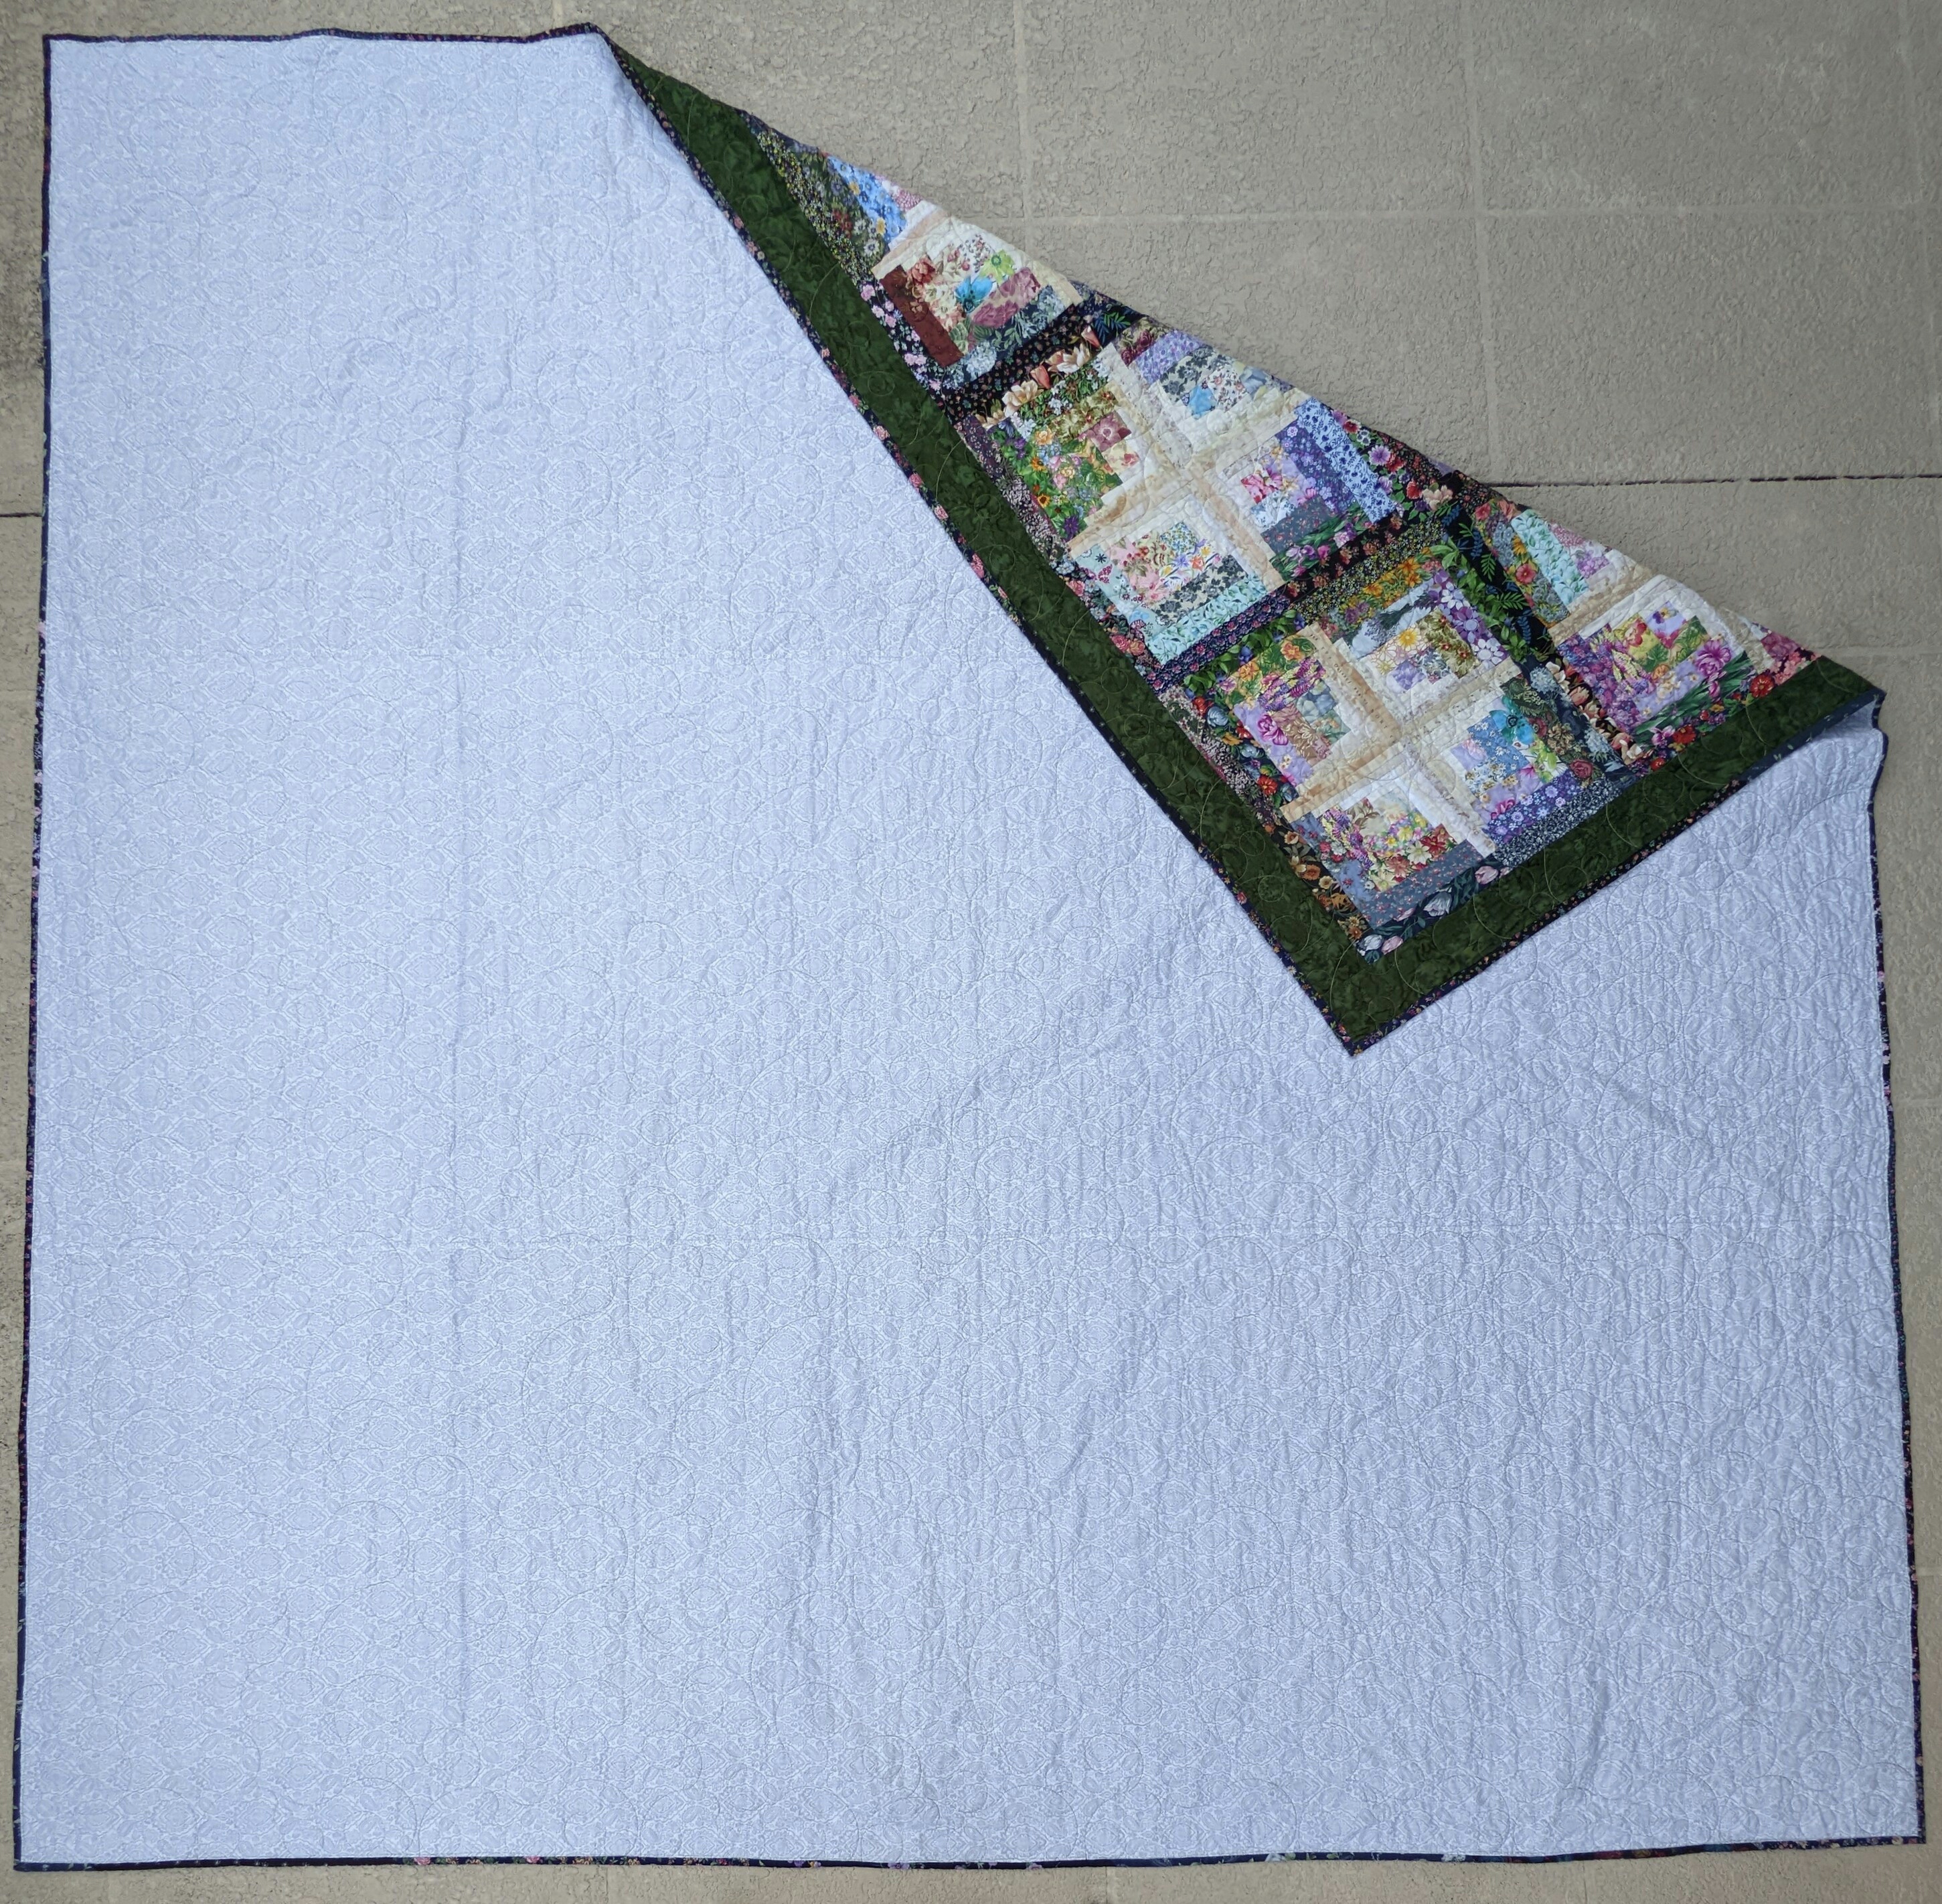

Backing: The back is nine yards of very lightweight cotton fabric: a gray paisley print on a white background, by Quilter's Choice.

Quilt Stitching, Pattern: I quilted using edge-to-edge "Bubble Vine Meander" from Wasatch Quilting.

Quilt Stitching, Thread: I used "Cashew" (So Fine 50 #405) thread for the front of the quilt, and "Silver" (So Fine 50 #408) thread on the back.

Label: I embroidered a short message, the year, and my initials right onto the binding, one of my favorite ways to label a quilt.

Binding: I made a scrappy dark floral binding for this quilt, attached by sewing machine.
💐IN ITS HOME:💐


💐PROGRESS PHOTOS:💐
Construction-Blocks:


I chain-pieced the blocks, making between 4 and 6 blocks in each batch.

I chose each "round" of fabric strips based on color values (from very light to very dark) and made sure to not let any like fabrics touch each other: not in the blocks and not in the assembly of joining the blocks, either. Initially, this selection process was very time-consuming, but I got faster as I made more blocks.


After the first 22 blocks were completed, I laid them out in different arrangements, then shared them with the quilt's intended recipient for her feedback. She chose the design where the neutrals formed a "+" shape, while the florals created large circles. She was very happy with the graduation of the floral prints from lights to darks, too. So I began working on making 78 more blocks!


Progression of block building and arranging on my design wall.
Construction-Borders:

We auditioned many different fabrics and colors from my stash, thinking about the colors of the room where the quilt would live, and decided we liked the dark green batik the best.

Attaching the outer border to the blocks, pinning before sewing.

Quilting:

Once the backing was loaded, I realized this is the largest quilt (103" x 103") that I've ever quilted on my long arm.


I baste each quilt sandwich completely, down one side, across the belly bar, and back up the other side, advancing and repeating, before I actually quilt it.

First time using edge-to-edge "Bubble Vine Meander" from Wasatch Quilting.
It's a loose design, not at all dense, that stitched out perfectly. It modified perfectly (resize, join, repeat, etc) in my ProStitcher software.
It's a loose design, not at all dense, that stitched out perfectly. It modified perfectly (resize, join, repeat, etc) in my ProStitcher software.


Beginning the first of 9 rows.

Even though this is the 90th quilt that I've created and stitched on my longarm, I still ran into an issue where there was more fullness in some of the blocks than there should have been. I used the "soup can" or "water bottle" trick (mine was a can of green beans, actually) to gently ease the quilting across the fabric before and after the location of the fullness. Worked great!


Stitching out the 9th and final row.

Even before removing it from the longarm or washing it, I already love the texture that the stitched "bubbles" connected by winding vines has created.
Trimming:

I lined up my ruler to cut exactly 3½" from the outer side of the inner blocks. That way the quilt's outer edge will be parallel to the squared quilt.
Binding:

I joined together several 2.5" strips of dark florals left from piecing the blocks, until I had at least 430" of scrappy binding.

Then I embroidered a short message, the year, and my initials onto the prepared binding fabric.

First I attached the binding fabric to the back of the quilt, using my sewing machine and a 1/4" seam...


...then I wrapped the binding around to the front of the quilt and stitched using my Bernina 240's blind hem foot.

Washing:

I machine washed the finished quilt twice (cold water, no bleach) using dye trapping sheets (I use either Color Catchers or Color Grabbers).


After washing, the quilt is just wrinkly and puckery enough, and very soft. The stitching is nicely spaced apart, not too dense, and the thread color doesn't at all take away from the neutrals and the floral fabrics.

And it has a lovely drape, too.

Ready to be delivered.
💐QUILT SUMMARY:💐
I machine pieced this quilt on my Bernina 240.
I quilted this quilt on my Janome QMP-18 long arm.Finished size:103" x 103"
Front piecing: (100)-10" blocks, arranged in a 25x25 grid, created using a Curved Log Cabin (also called Uneven Log Cabin or Twisted Log Cabin) pattern, and utilizing the watercolor effect when selecting fabrics.
Border: One 3.5" wide dark green batik border.
Back: A gray paisley print on a white background, by Quilter's Choice.
Binding: Machine-attached scrappy dark floral binding.
Quilting: Edge-to-edge "Bubble Vine Meander" from Wasatch Quilting. "Cashew" (So Fine 50 #405) thread on the front, and "Silver" (So Fine 50 #408) thread on the back.
Excellent job!
ReplyDelete